I wanted to do a little showcase for the things I’ve made lately and show you what occupies my free time these days.
These items were Christmas presents and with varying degrees of success. I’m very much a novice blacksmith at this point and my woodworking skills are moderate at best.
Still, these are things I’m really enjoying doing and I’m having fun perusing them while improving my skills with each hobby.
Most of these pictures aren’t very good. Most of them were taken as an afterthought and some were taken after I gifted them to the recipient. I’ll have to work out a photo setup for this type of stuff as my miniature picture setup isn’t put together since the move and too small for some items.
Blacksmithing
Making Christmas gifts was a great way for me to really try and push my blacksmithing skills. I’m still a beginner but I find having a specific goal in mind, liking making gifts, really focuses my energy and makes me better.
Oh, I’ve also created an article on how to get started blacksmithing if this is something you’ve been interested in. It covers the tools you’ll need to begin making your own projects.
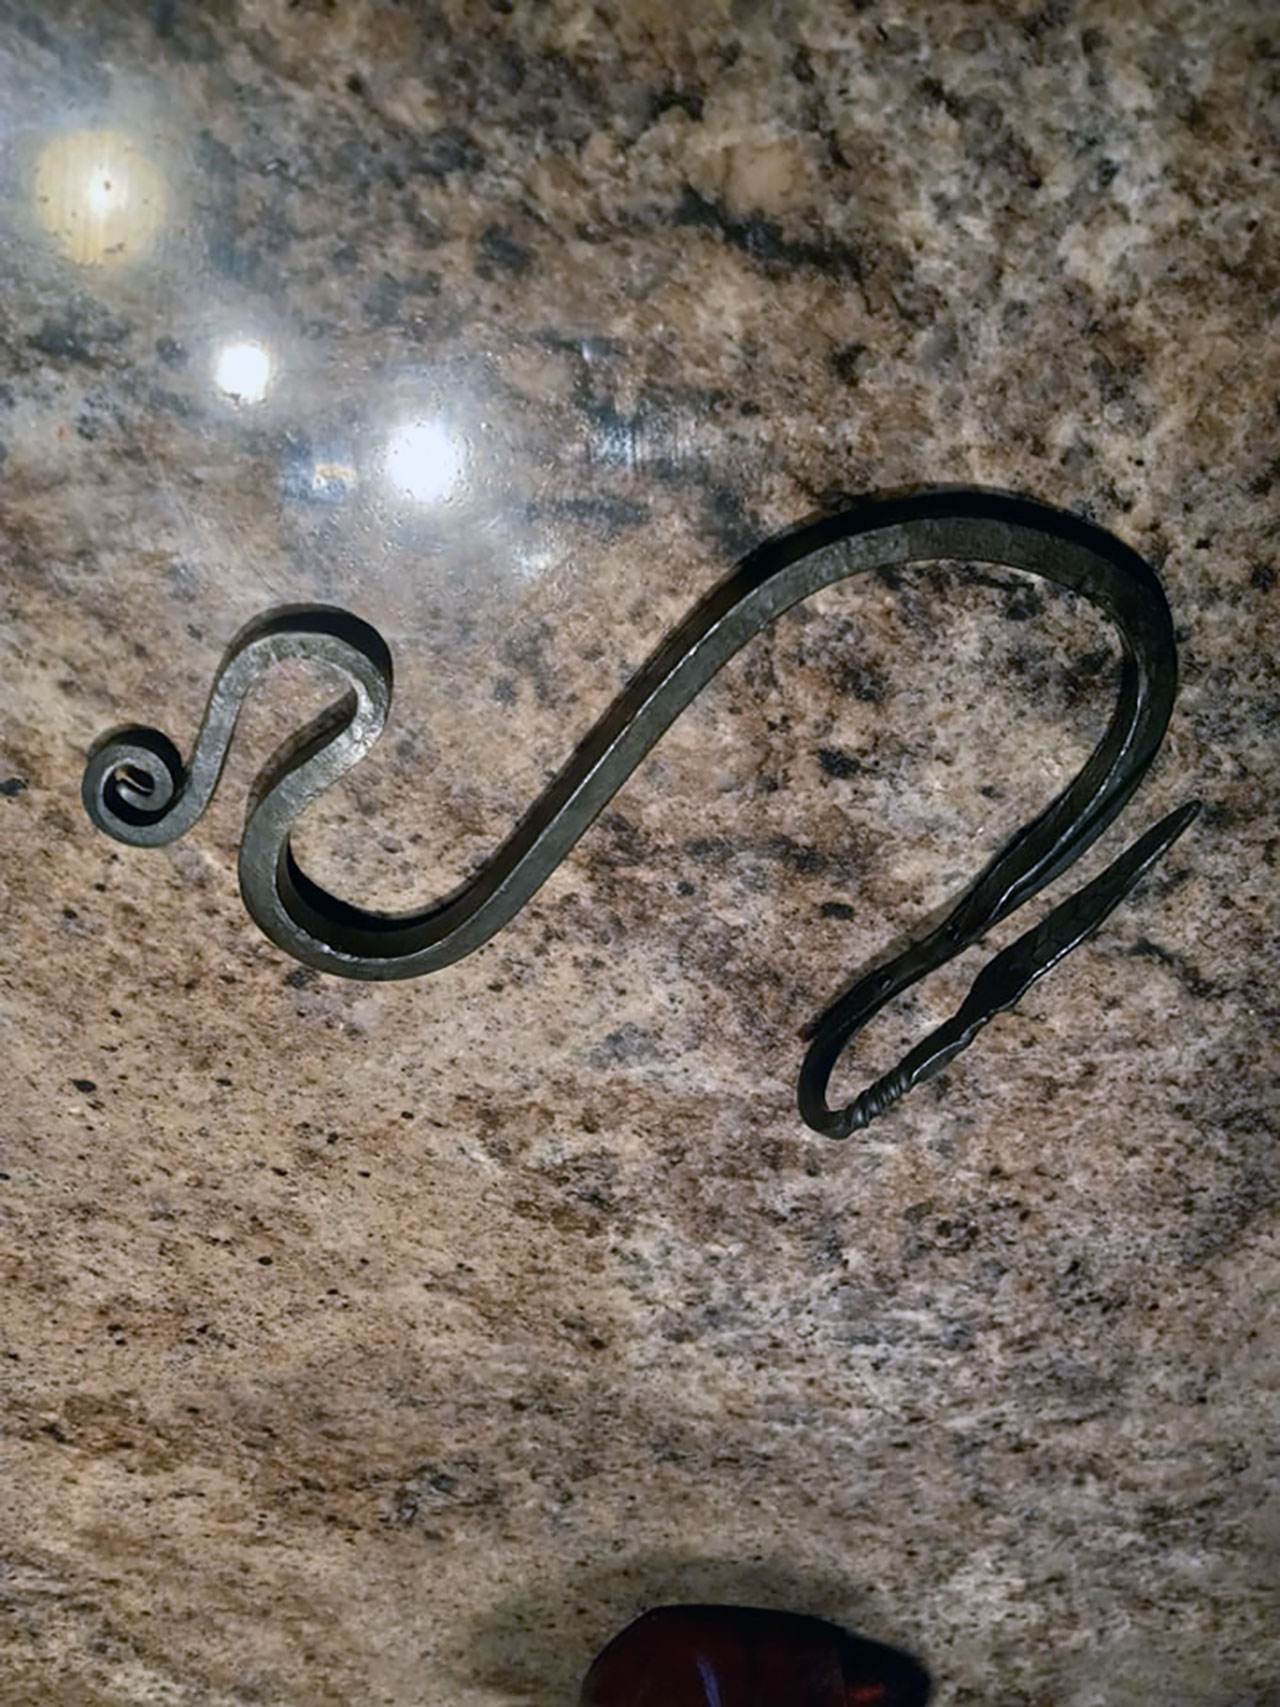
Bottle Openers
Here’s two bottle openers I made.
I liked the design of these because they required less smithing than a more traditional one, in turn making it an easier project for me in my first attempts at something like this.
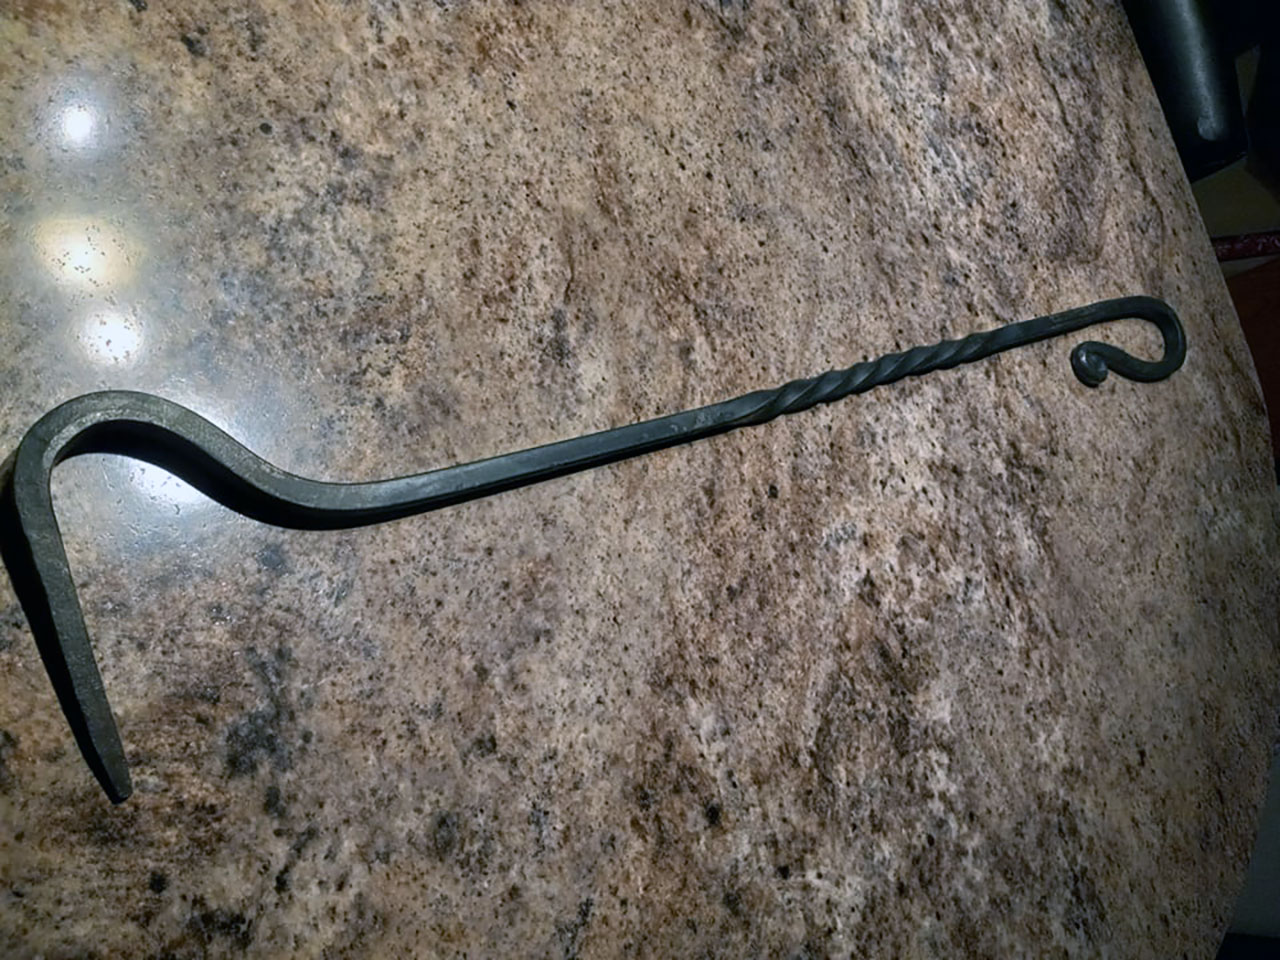
Fire Poker
I had posted a few fire pokers I’ve made myself previously and so I decided to make one as a gift as it’s an easier blacksmithing project than you’d think; and I think they look great.
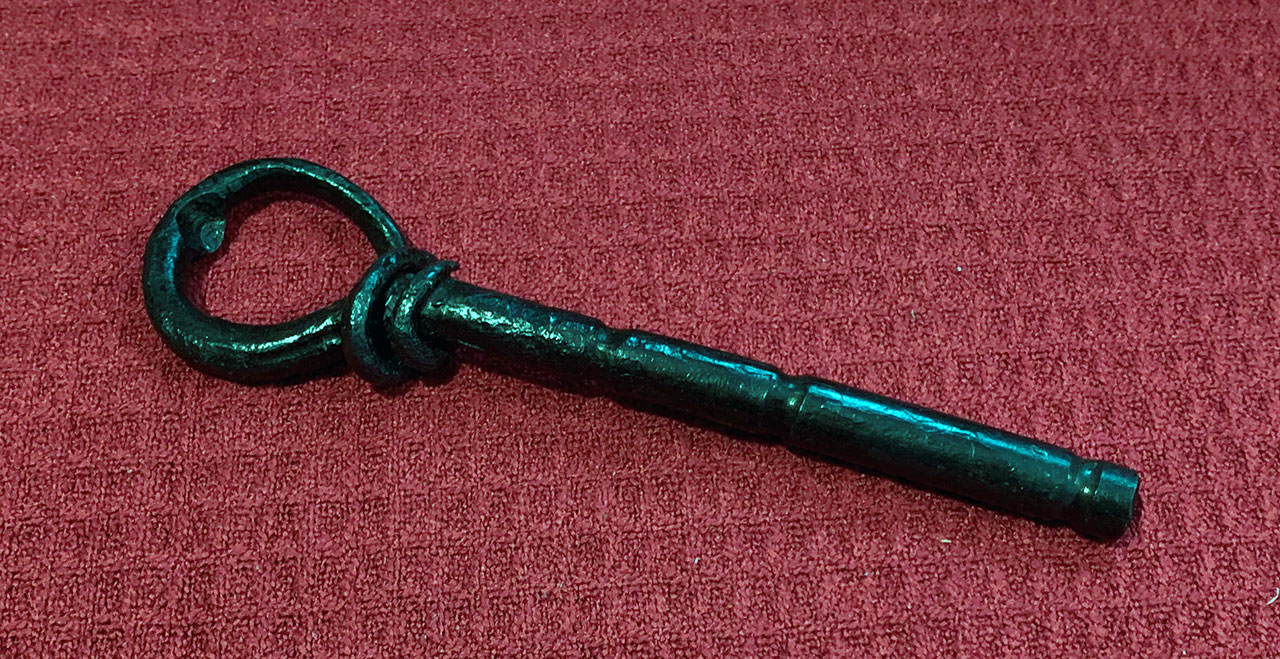
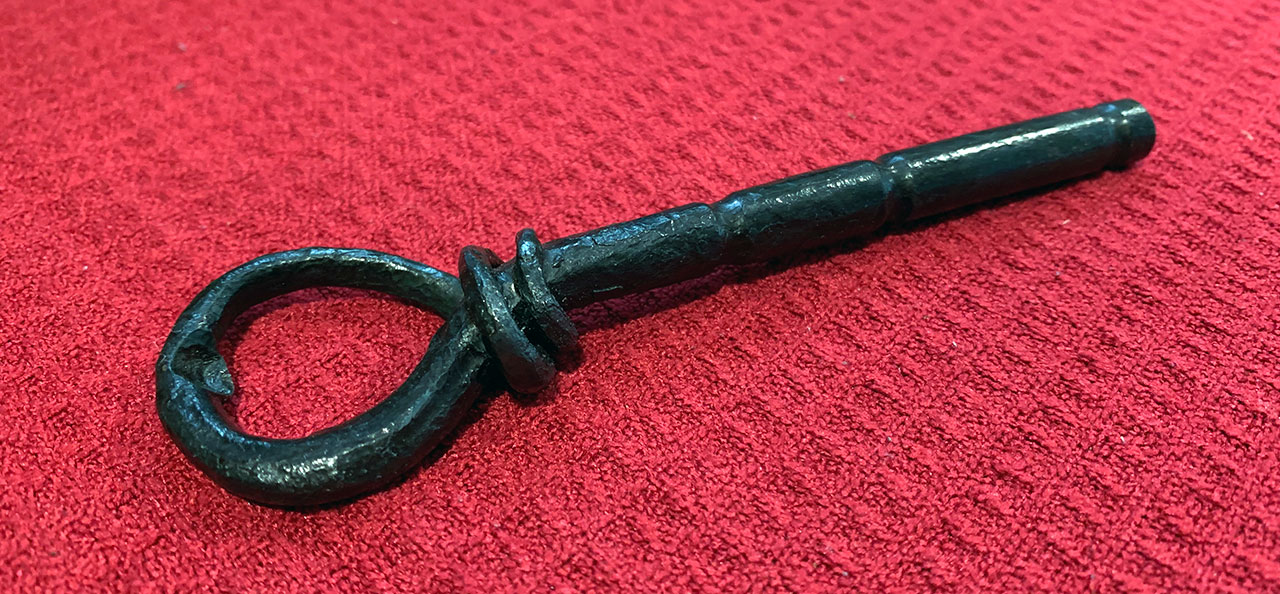
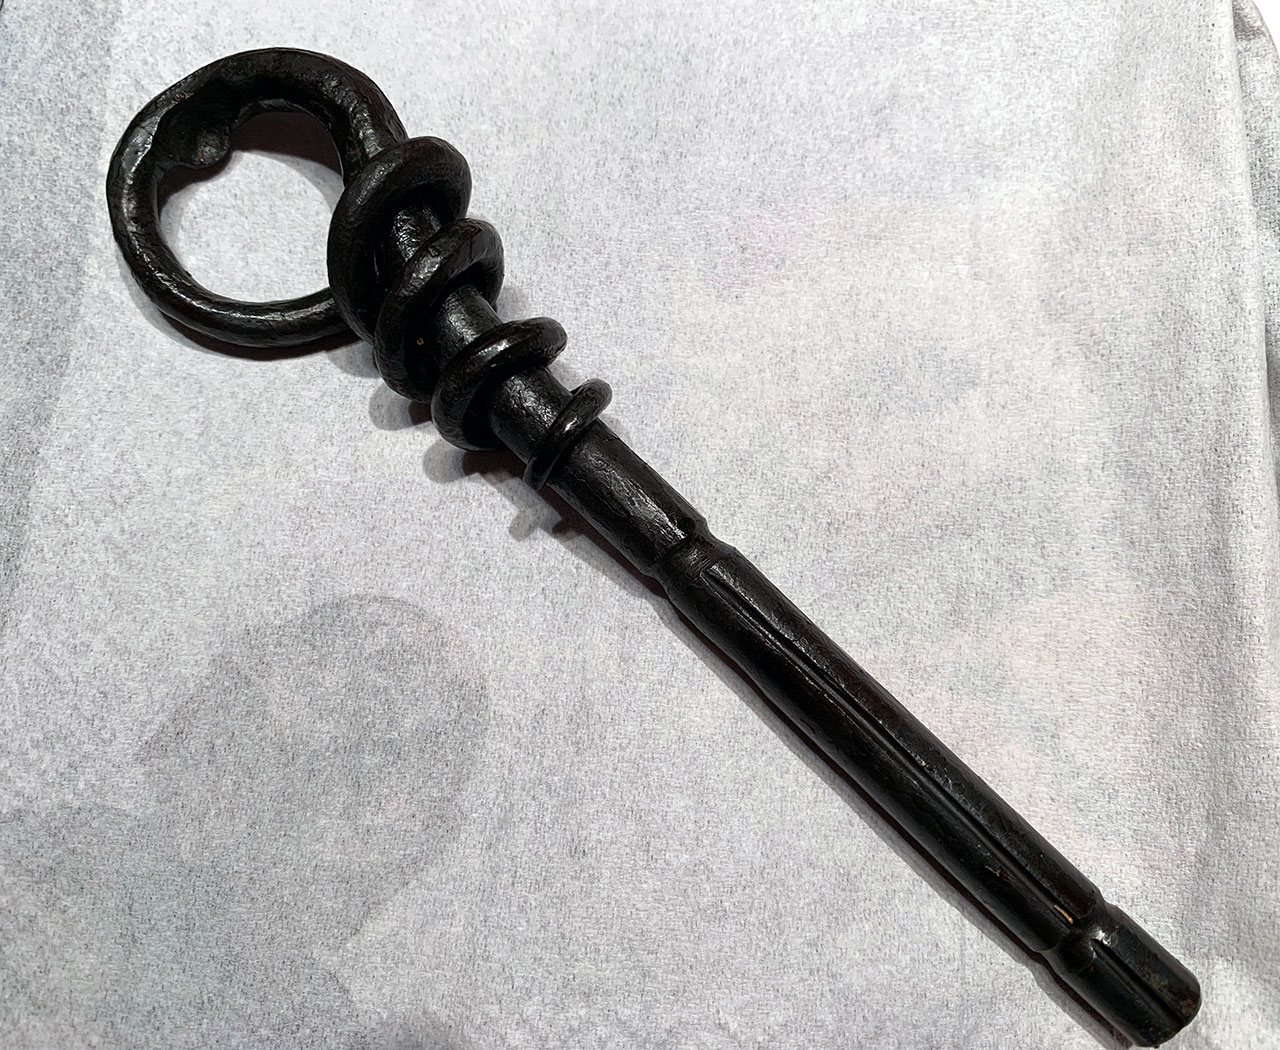
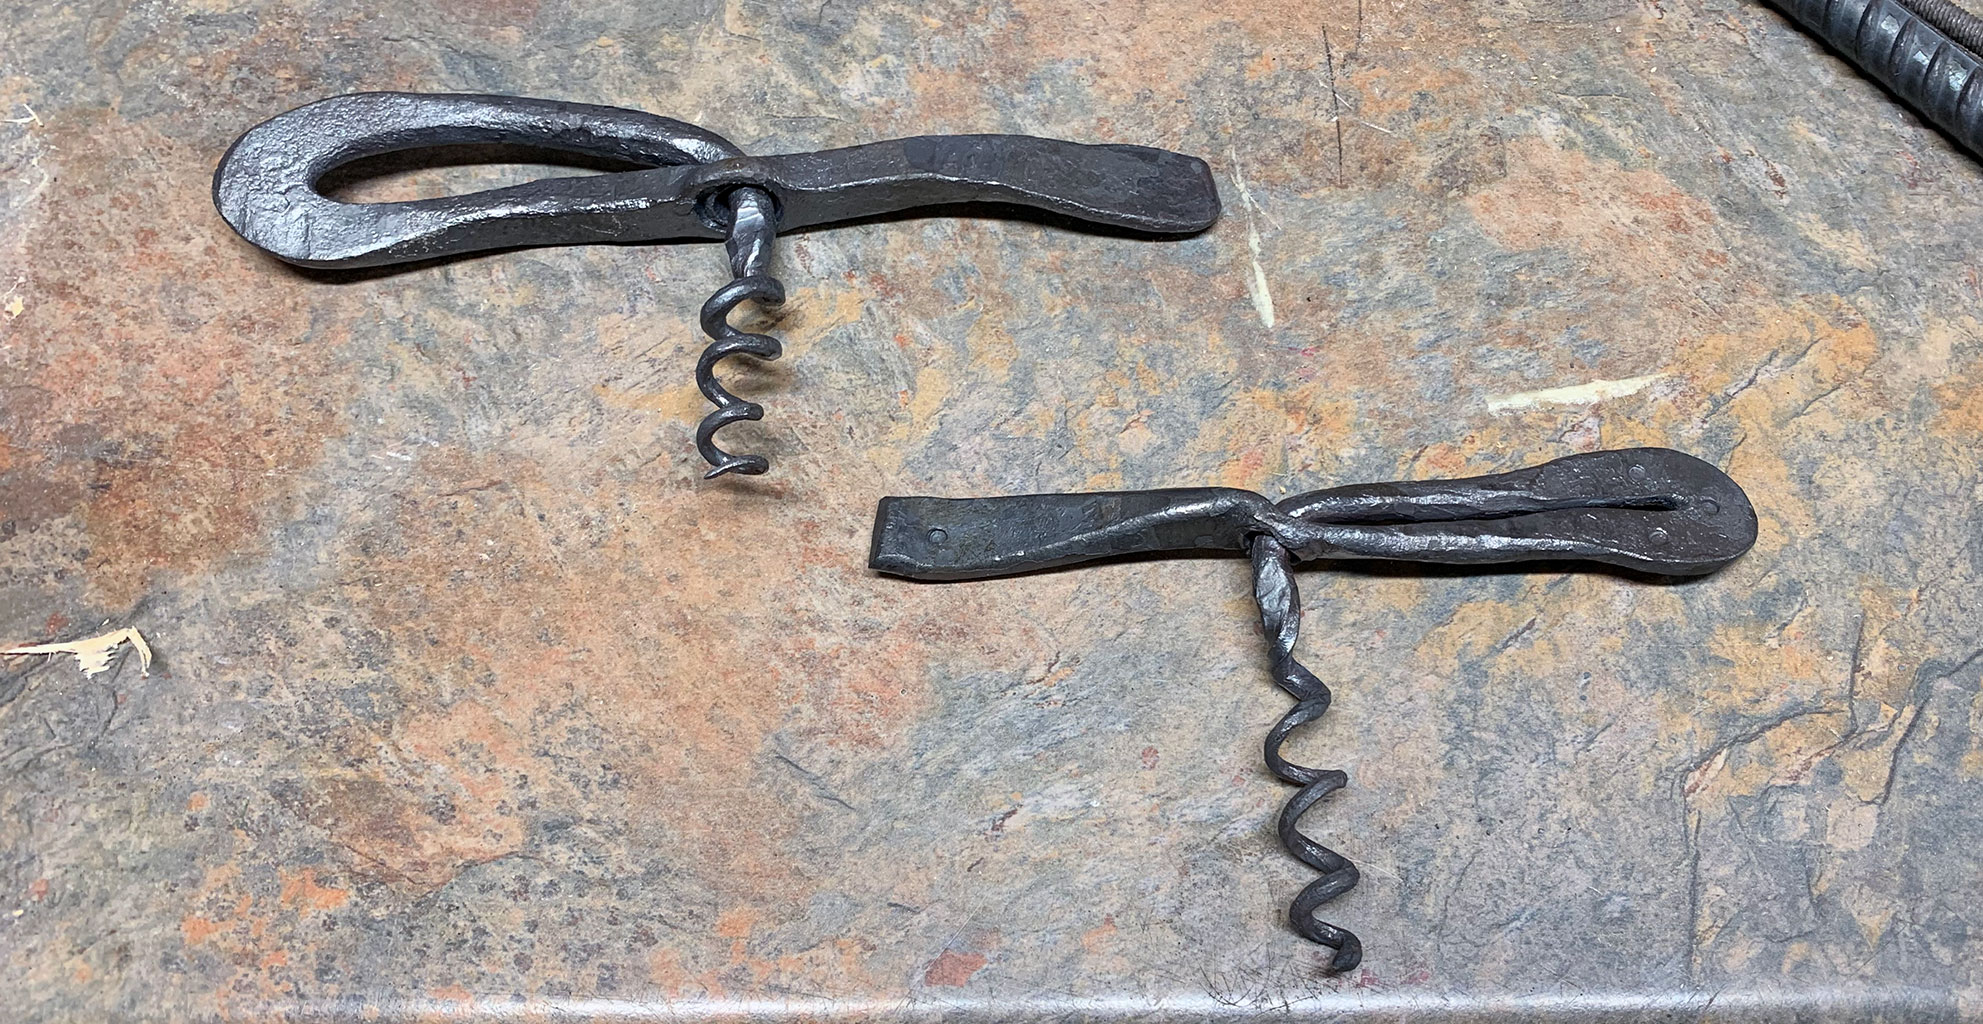
Wine Openers
These are purely decorative, though that was not the intent. I had made these to be used but realized once I was done that the steel for the corkscrew was too thin and not strong enough to endure actual use.

I plan to revisit this later and make a new one using a proper steel. For now though they’ll go in my bar as decoration.
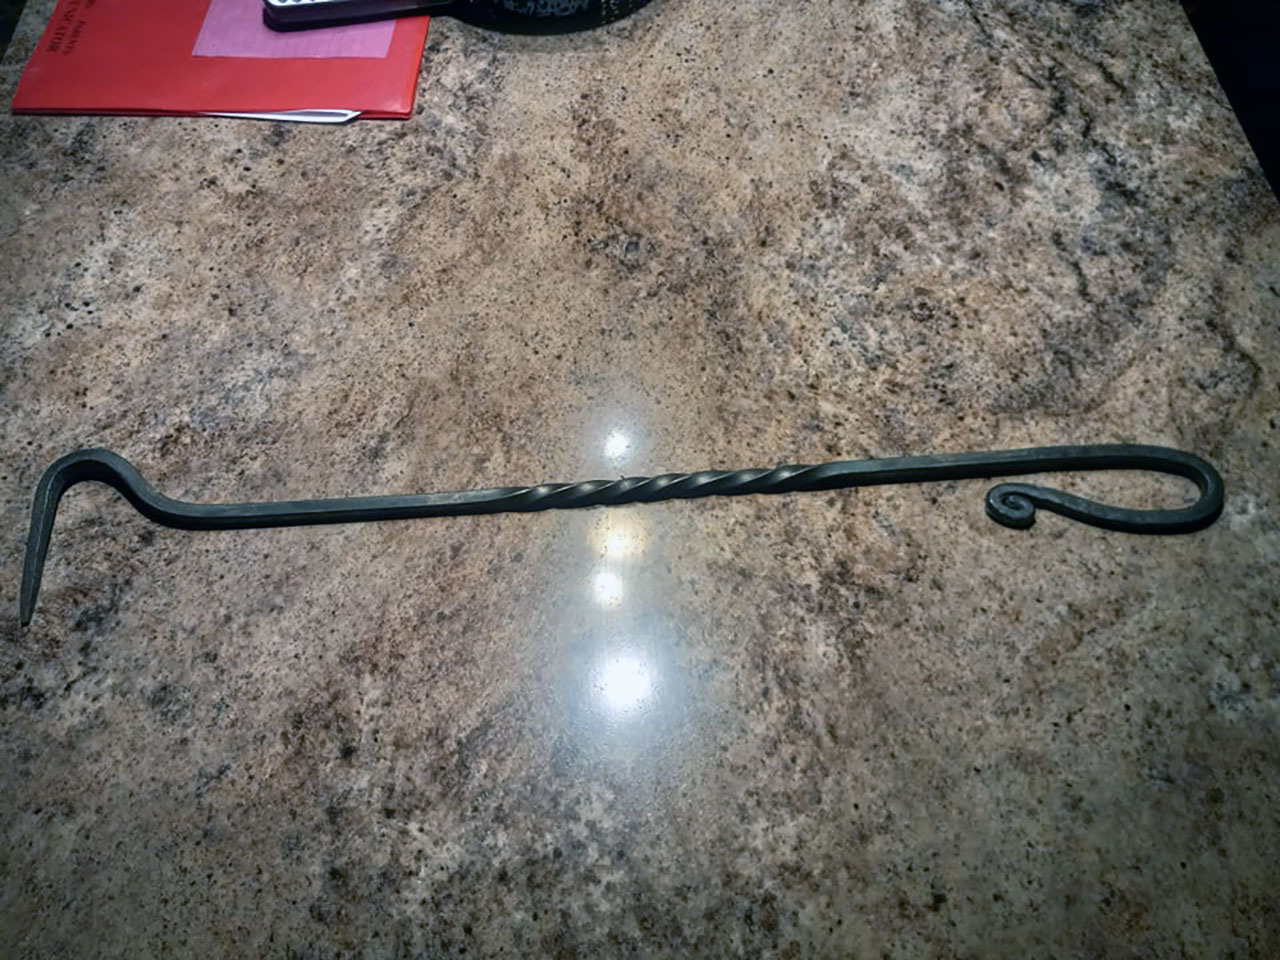
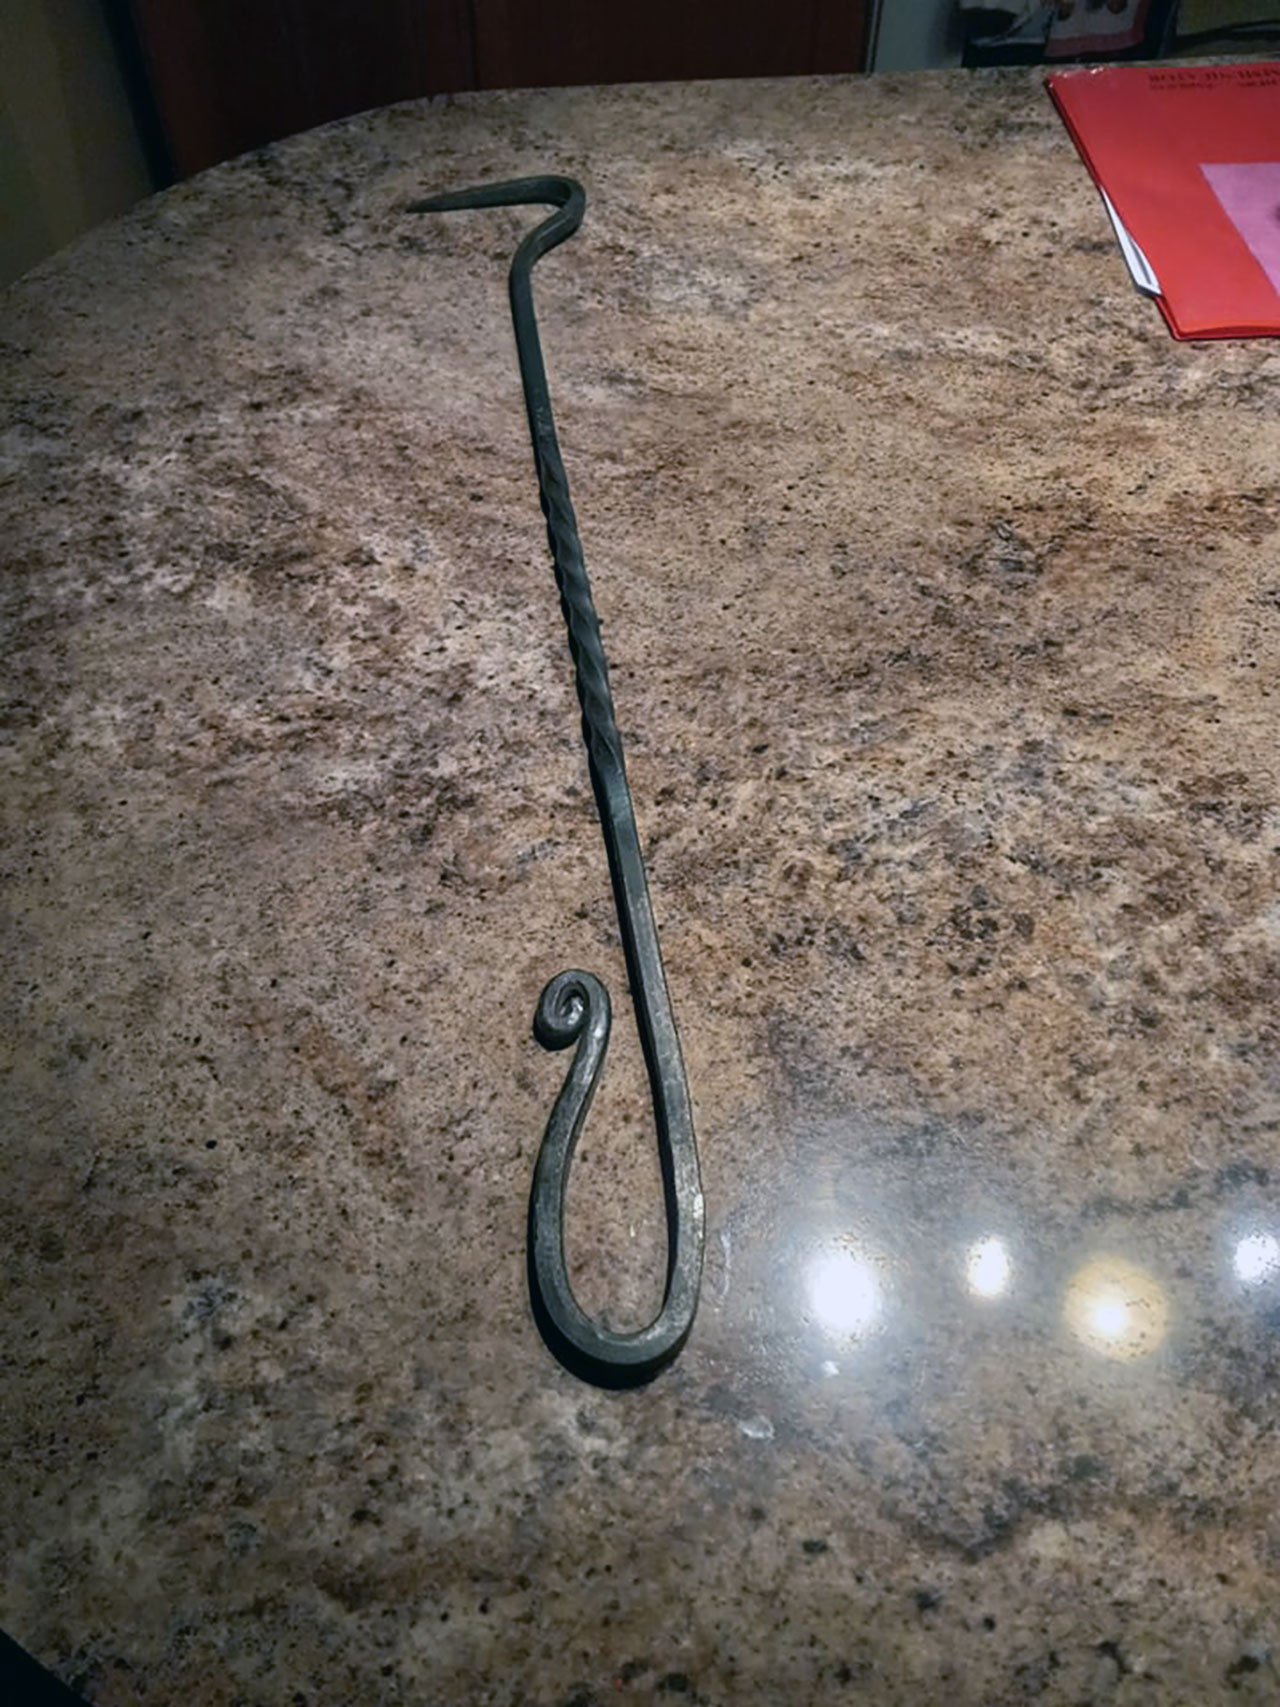
Plant Hanger
This one would make more sense to see in use but it’s winter where I live and so that will have to wait.
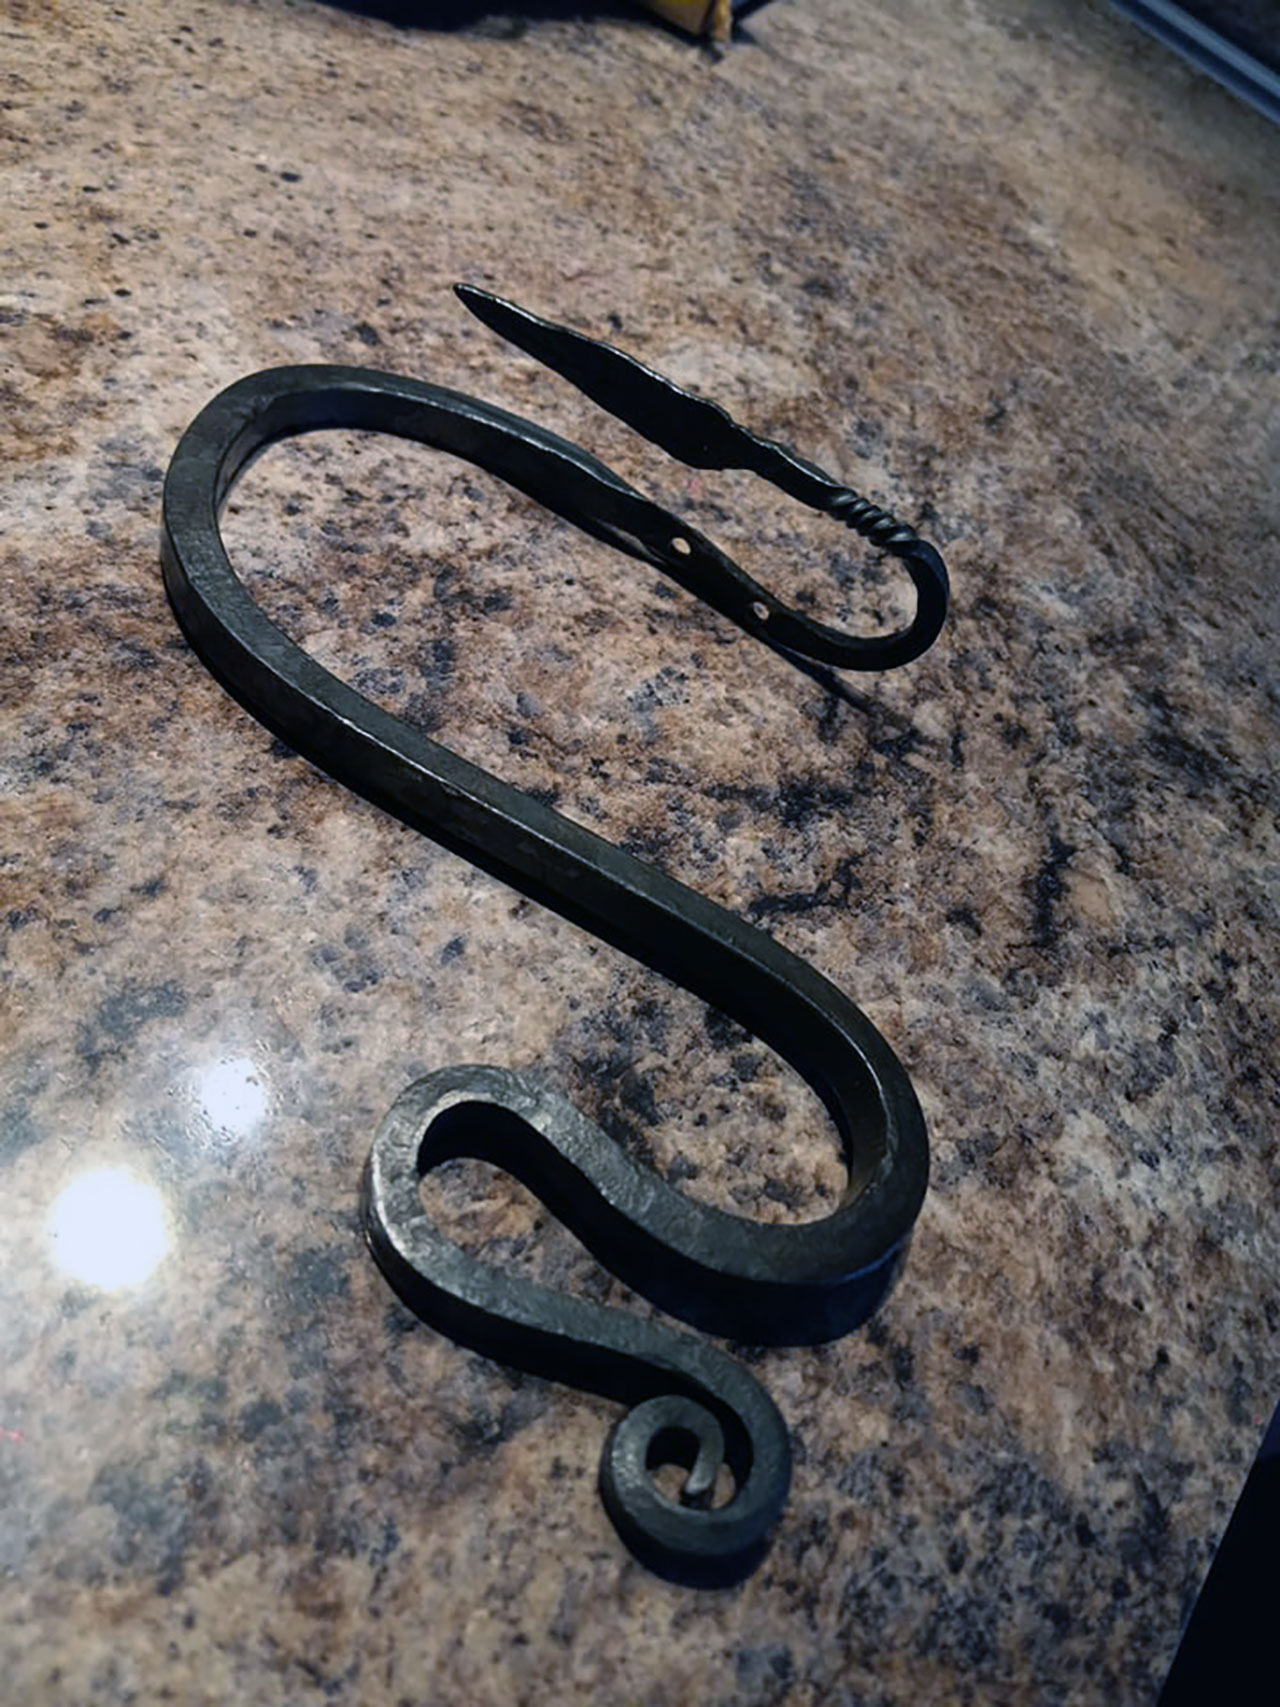
Anyway, it’s an overly decorative plan hanger. The black part with the leaf lays flat to be attached to a fence or any flat surface – you can see the screw holes. The plant would hang near the left side in that last “valley” you see before the curl.
This came out a lot bigger than I envisioned but there’s no arguing it will hold up a plant 😉
Wood Working
Despite having done carpentry professionally in my youth, wood working is something I never really got good with, however, I’ve always loved doing it. Now that I have a place to do this properly I have every intention of getting better and learning everything I can.
Coasters
These were super simple to make and fun as well.
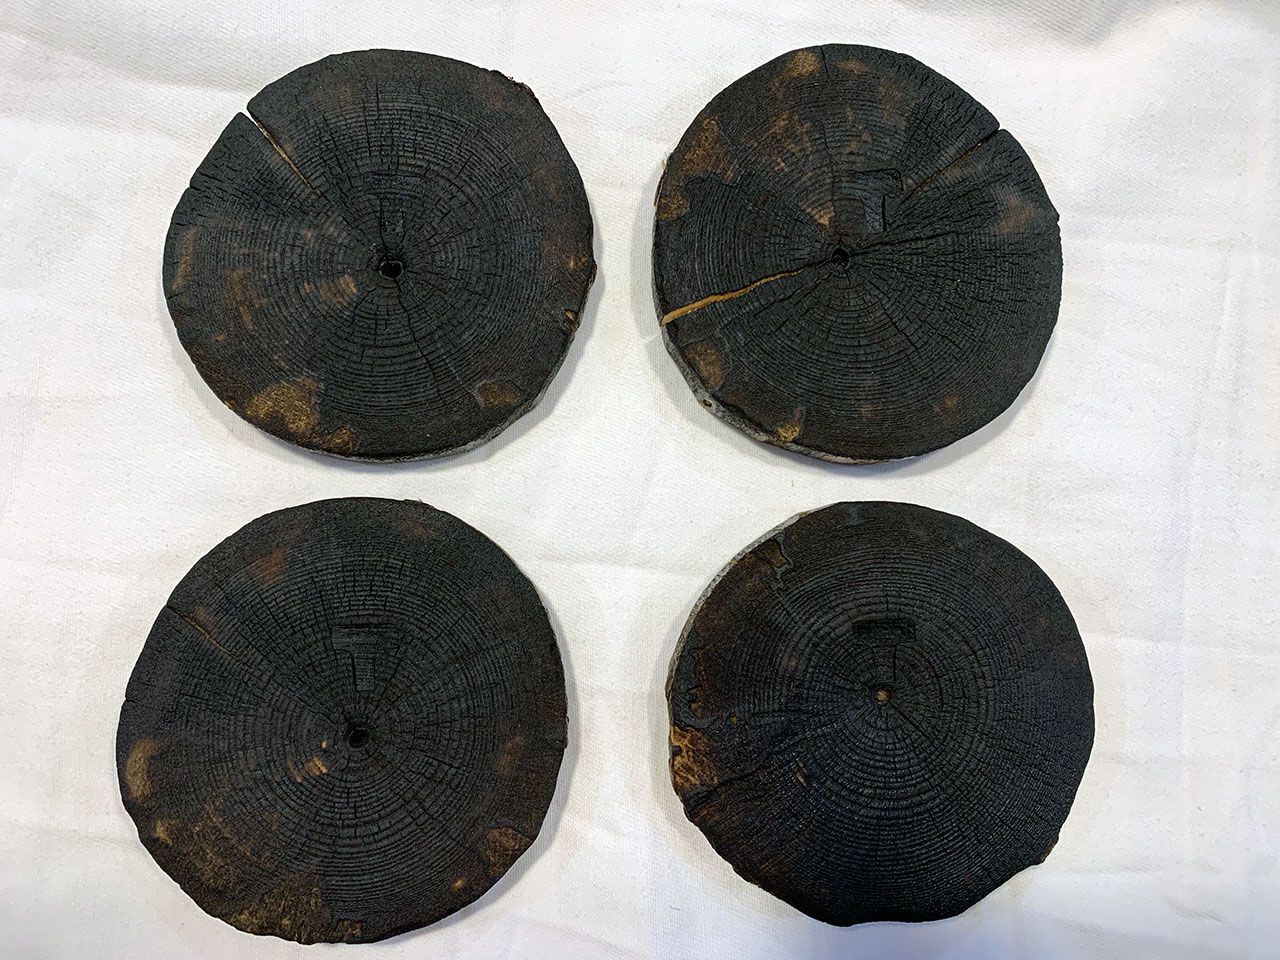
These first ones I wanted to try out a wood burnt finish called Shou Sugi Ban or Yakisugi, which is an ancient Japanese finish.
I went a little too far with these but I like them regardless.
Next I made another set of coasters using the same technique but more controlled since I had a better idea what I was doing.
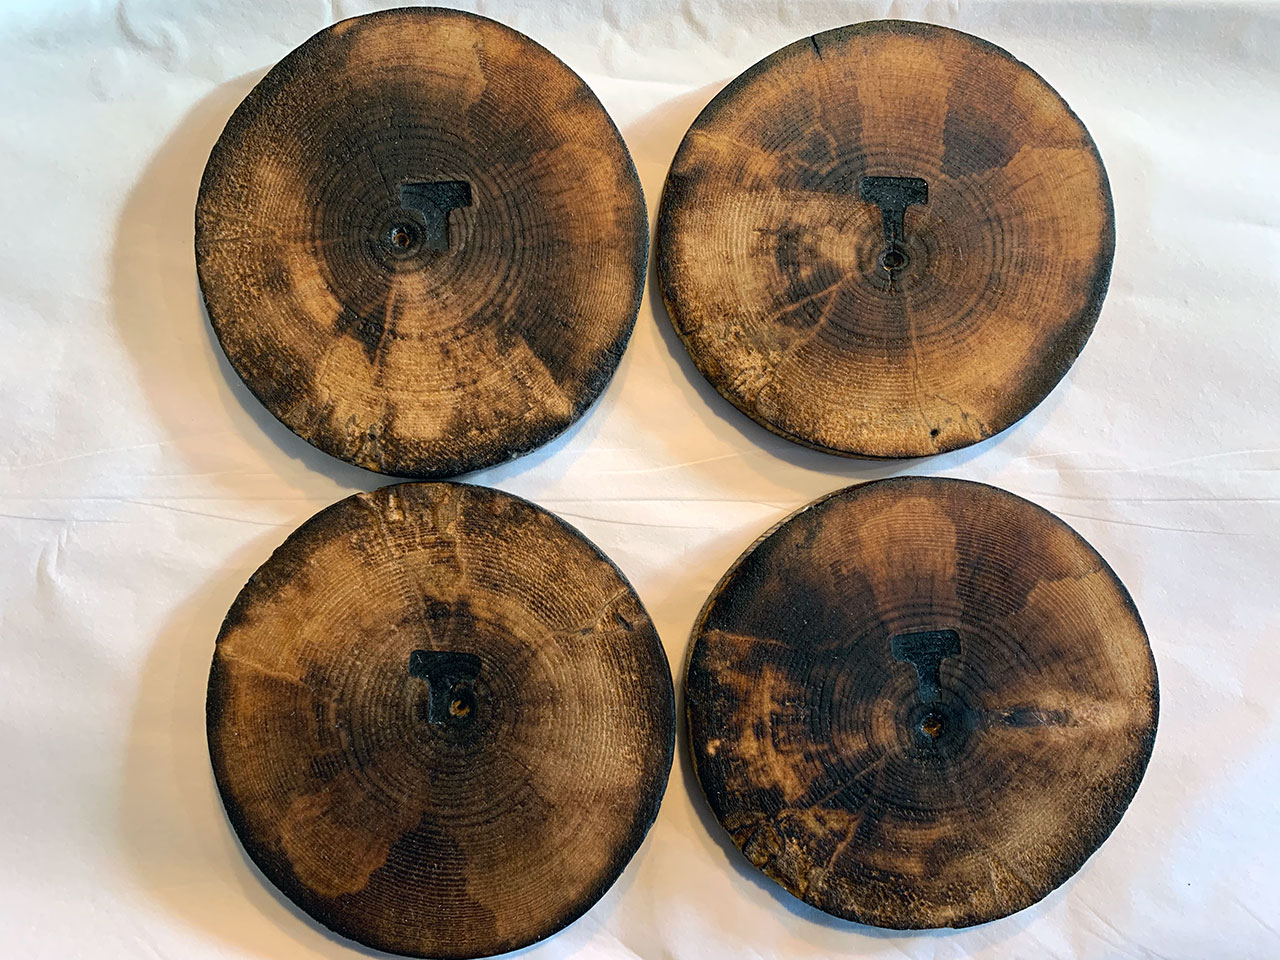
The imperfections in the wood is because this is from a tree that was on my property. It sat out there for who knows how long and was not properly dried or anything. I like the look though.
Actually, all of these were made the same way. Those imperfections are most obvious on this one because it’s not overly burnt like above and the last set wasn’t burned at all, which is what brought out that look you see.
I burned a T into them since they were for a friend named Tyson.
Lastly, a more traditional set of coasters but with some wood burning using the wood burning kit I picked up off Amazon. These were for a cousin who moved to Arizona but is from Maine. I wanted to add elements that reminded her of home.
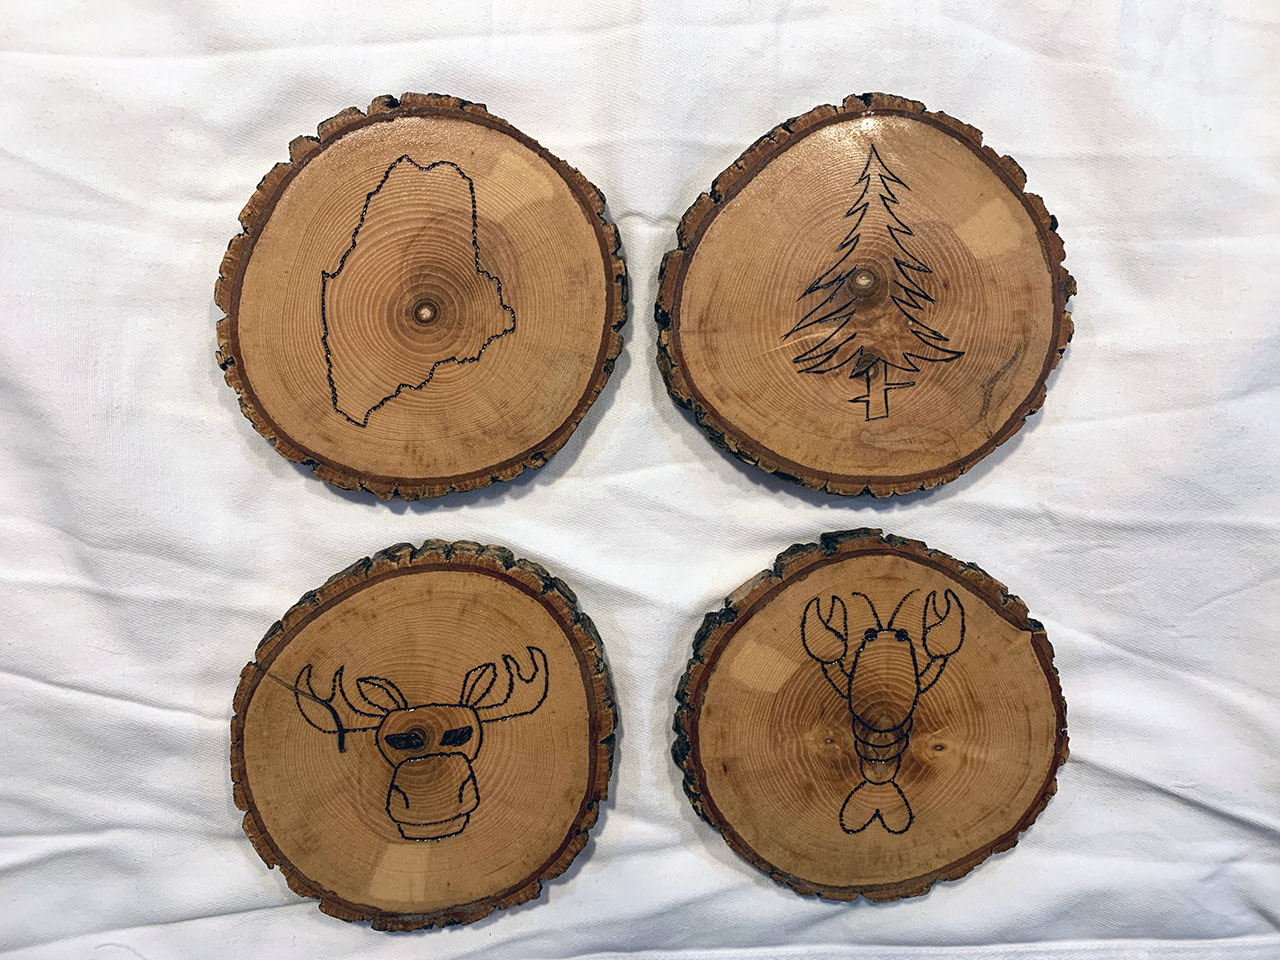
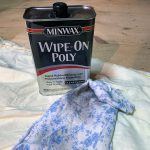
All of these were finished with a wipe-on polyurethane. Technically the first two sets didn’t need it as the burning finish waterproofs them, however I decided to play it safe and use a sealer anyway.
Cell Phone Stand
I know you can buy popsockets or get a cheap plastic cell phone stand, but I thought it would be nice to make something that’s decorative and useful.
I saw some other wood version ideas for a stand that were neat. They were like a kickstand that your phone slides into. The great part is it’s small but I didn’t like the idea of potentially obscuring parts of your phone with them.
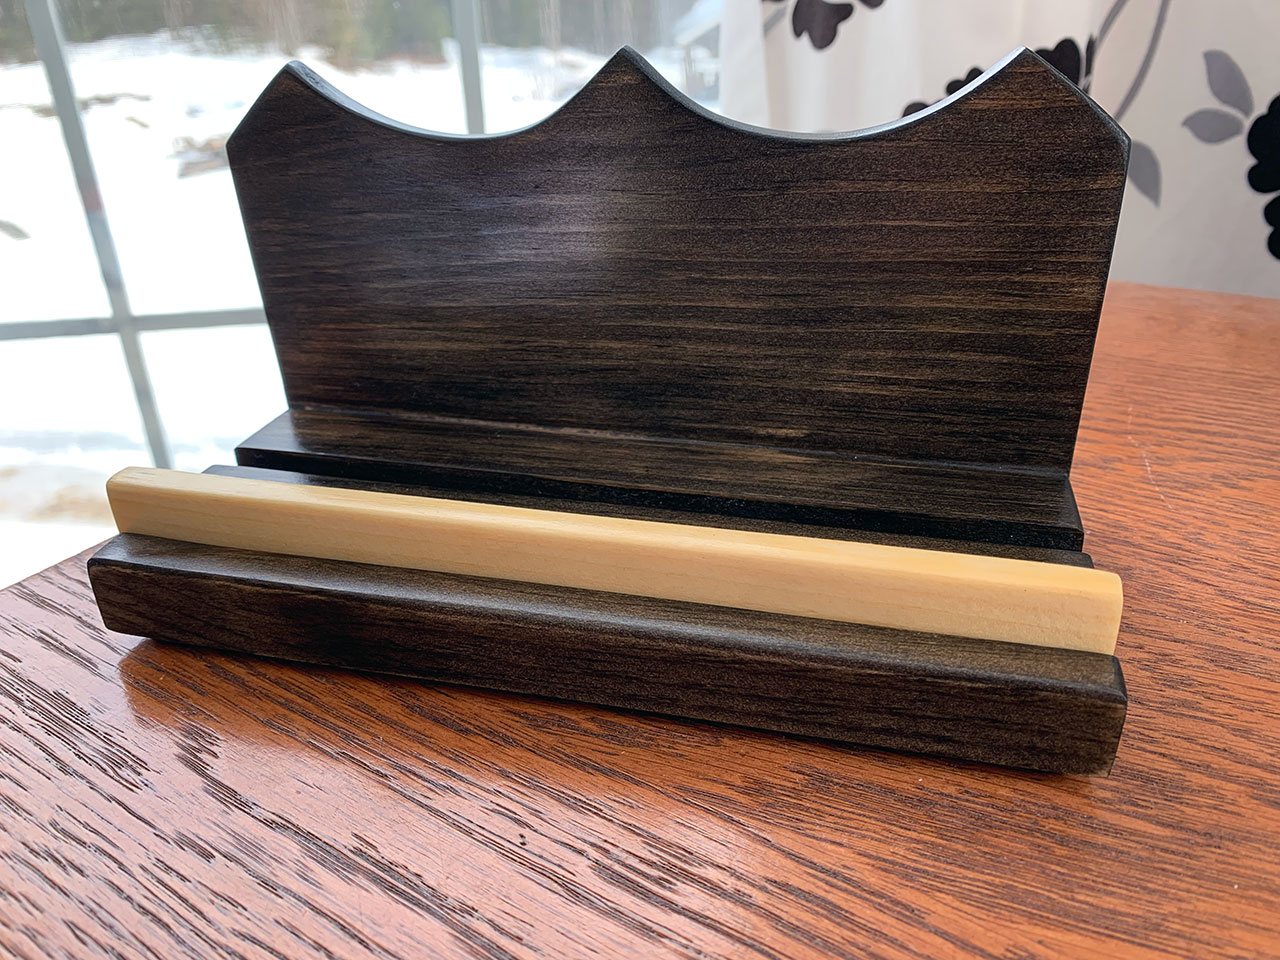
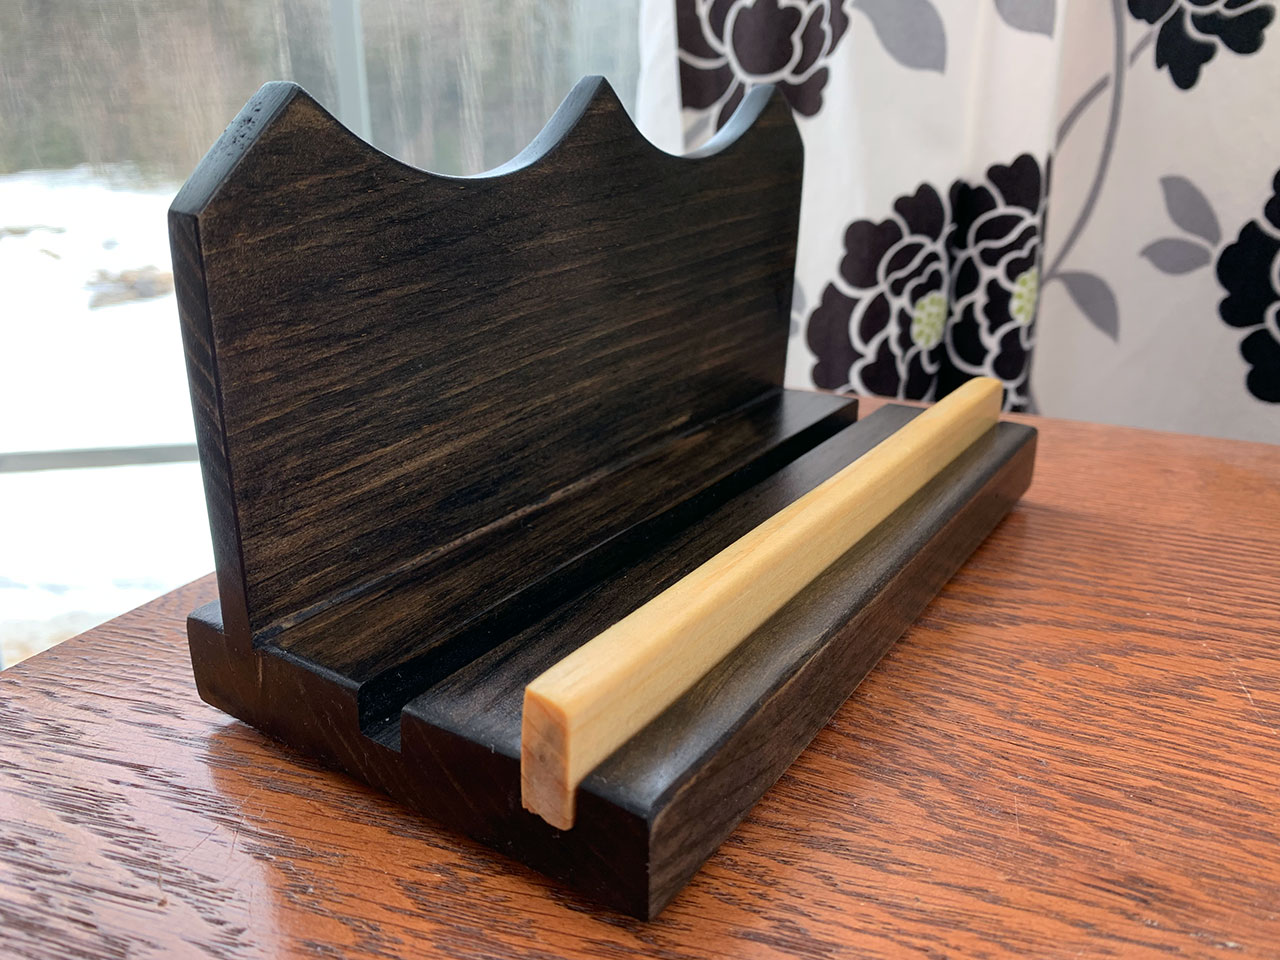
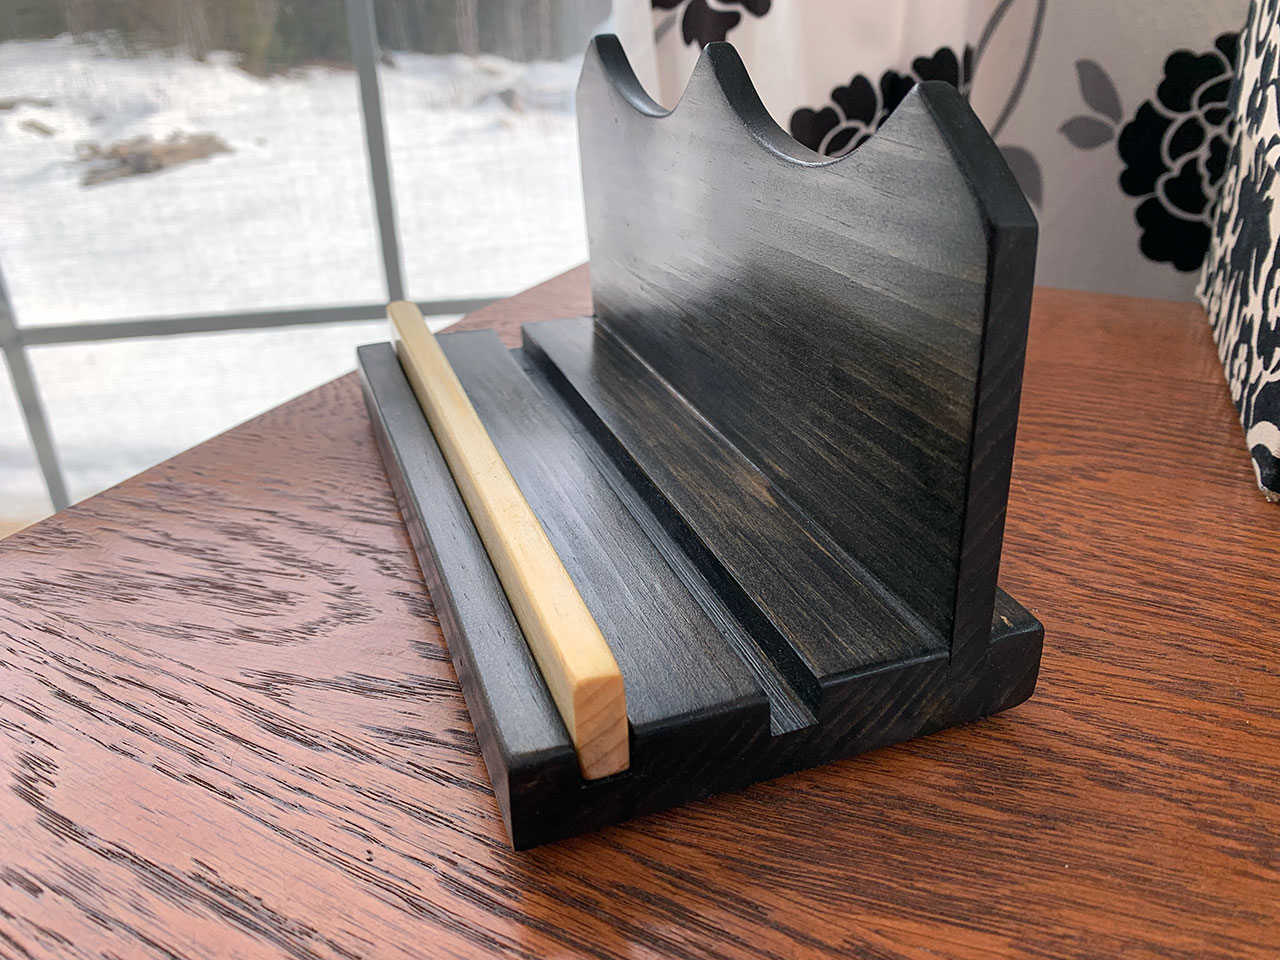
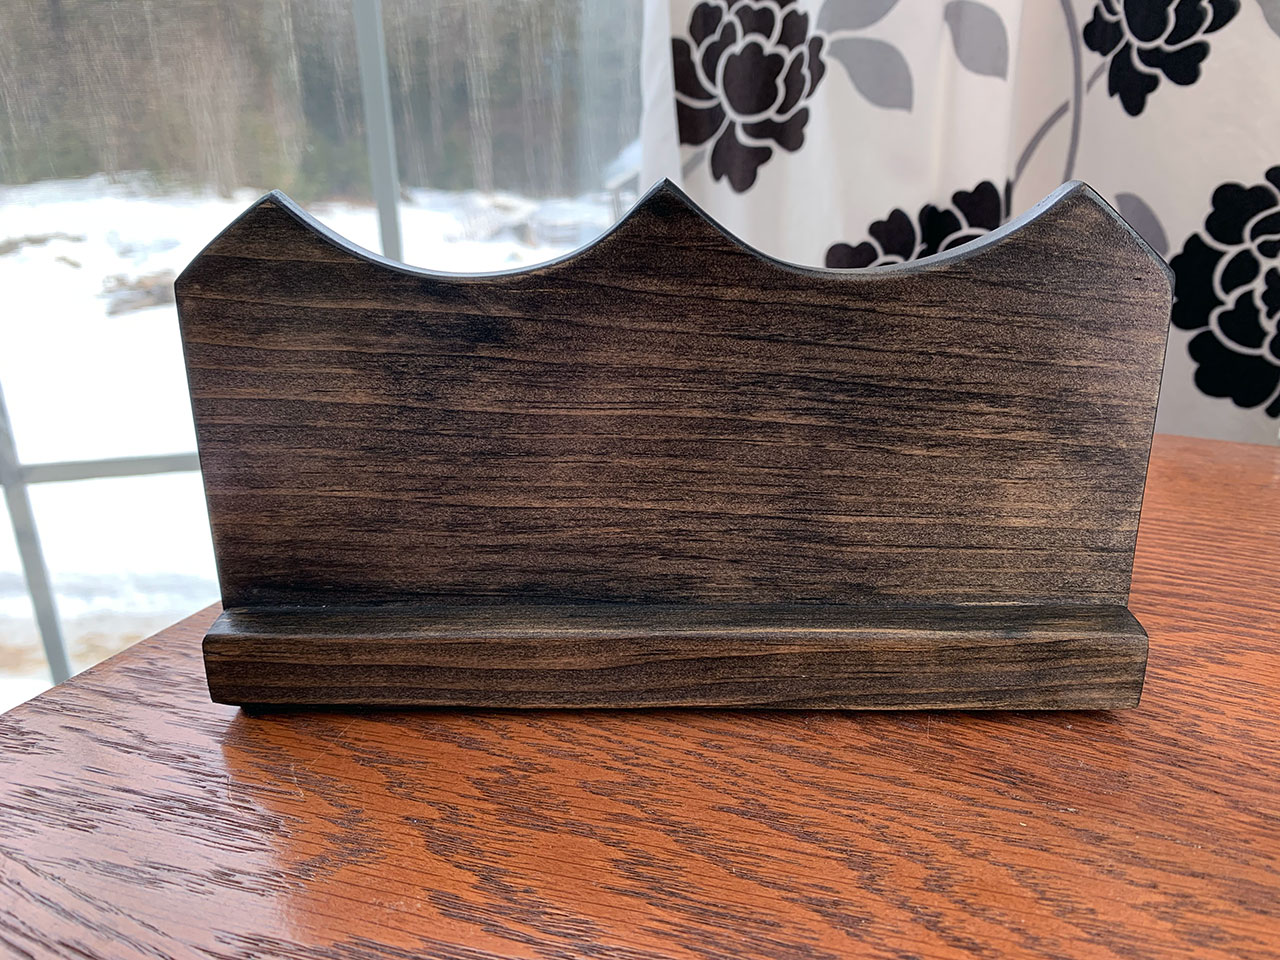
This is made out of pine.
The lighter colored piece is the stand part that holds the phone up (it leans against the back). I put two slots in there so the holder (whatever you want to call it) can be moved for positioning.
While this was the simpler of the “bigger” wood projects, I really like how it came out. I think it’s mostly that ebony finish that I like.
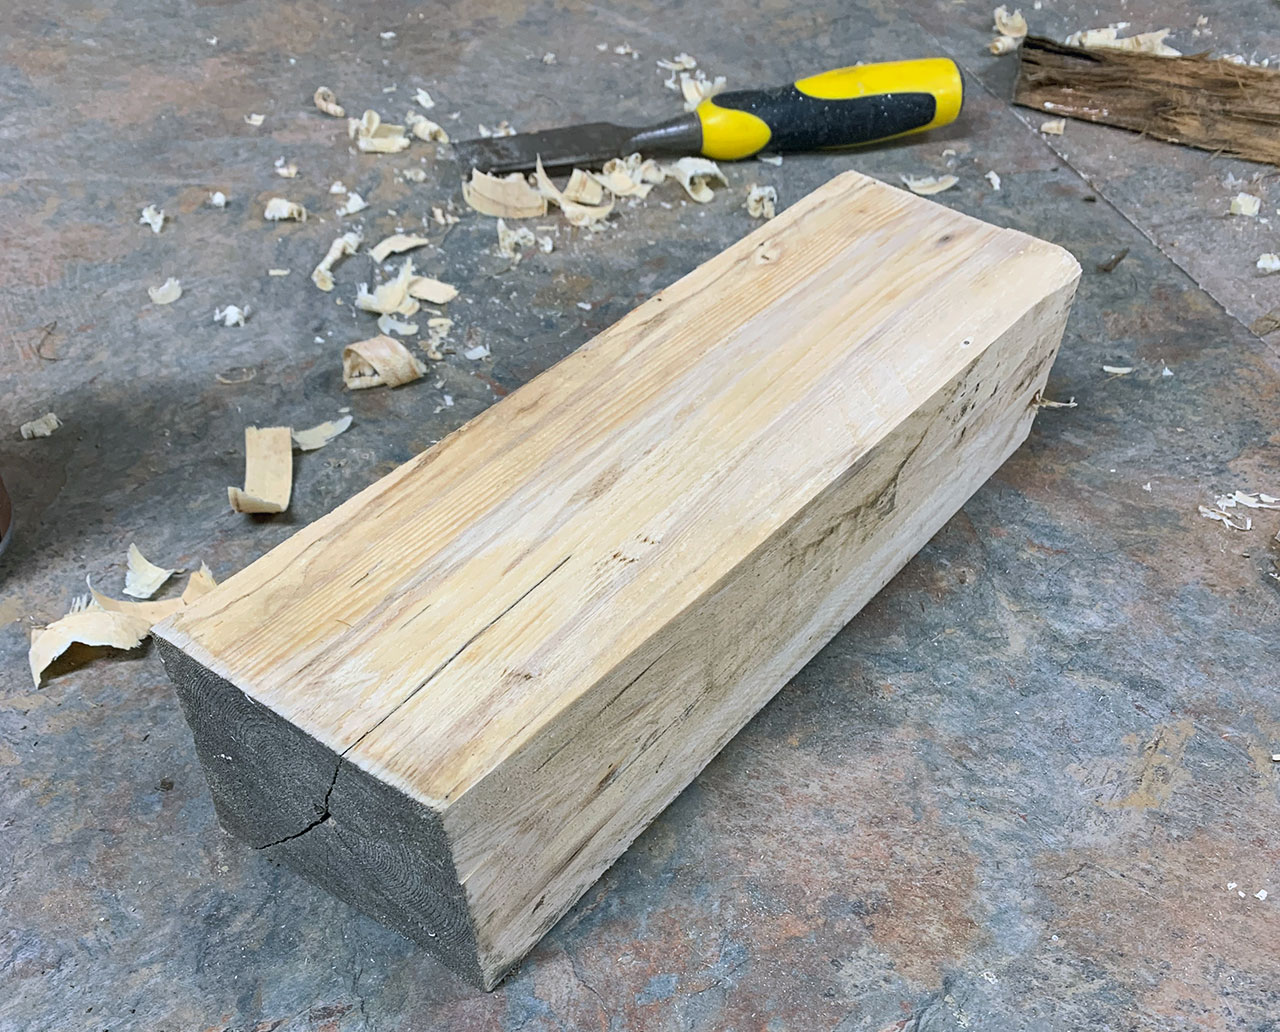
Decorative Box
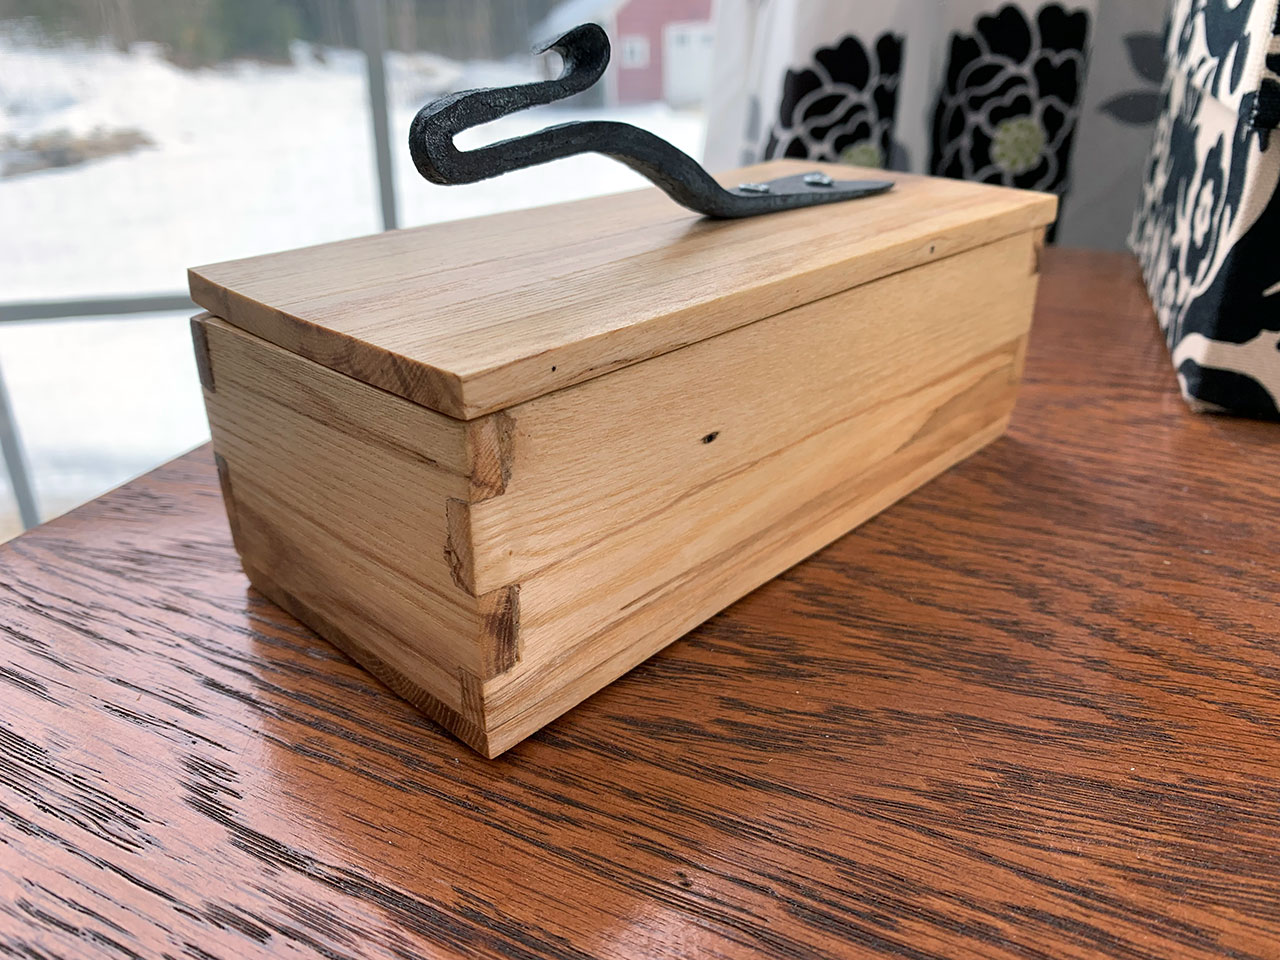
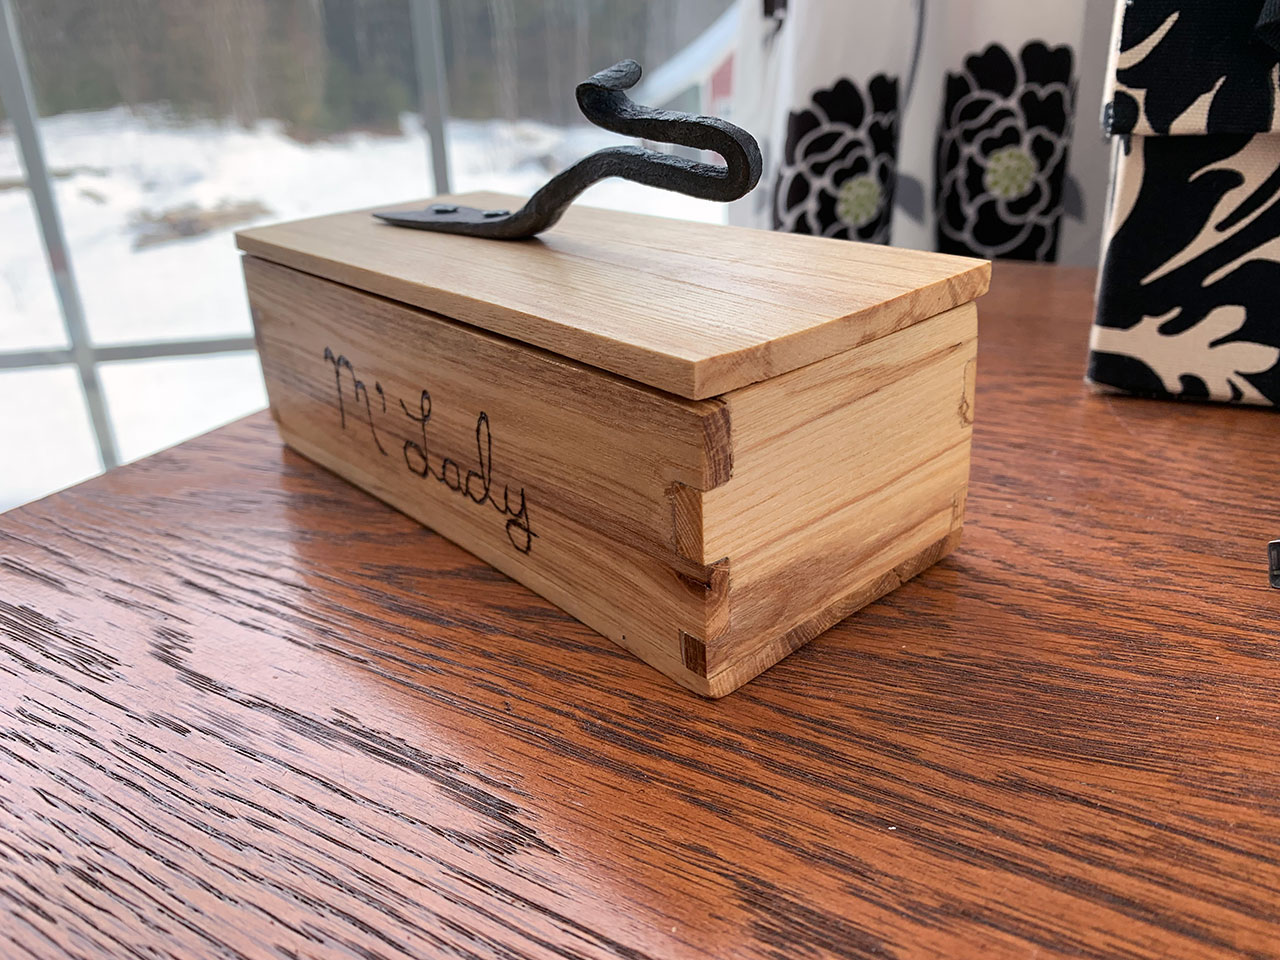
I made this for my wife. I took an oak log and milled the wood used in it so this is entirely from scratch.
The handle was a weed pulling tool of her father’s. I reforged it to what you see. That wasn’t the original design for the handle but as things go the original idea wasn’t working so I adapted.
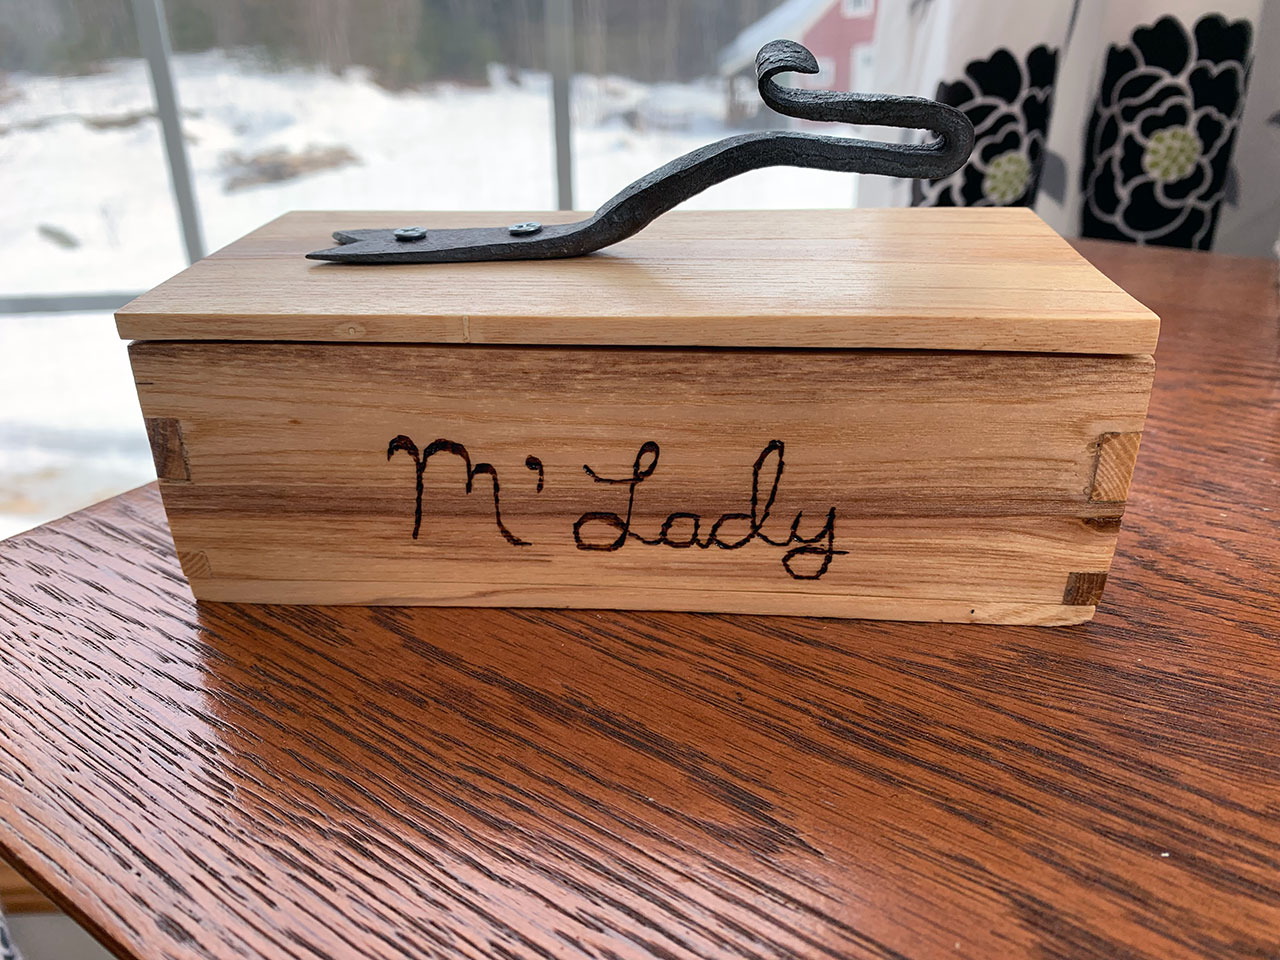

The screws are temporary for the moment and will have proper blacked screws to match the handle next time I fire up the forge.
My big goal on this was to learn to make box joints and to do it by hand. The wood is only 1/4″ thick and I was afraid I’d royally mess it up with power tools. Seeing as I milled the wood, I couldn’t just replace anything I messed up.
Overall I’m happy with the box joints but they have some issues. The wood wasn’t perfect considering I milled it, and I had to fight a lot to make things work.
In the end I had to level out the bottom and in turn I lost some of that bottom box joint so it’s not even all around. It still bugs me.
I also realized after I did all my cuts for the box joints that I didn’t cut them all the same way. You’ll notice the joints move on the back compared to the front. While not intended and just a beginner’s mistake, I like how that looks.
Oh, and there’s wood glue on there still at the joints that I didn’t catch until it was too late.
Lastly, I wood burned M’Lady on there as that’s the pet name I have for my wife and I wanted to add some personalization for such a present.
I have issues with the box and the quality isn’t where I’d like it to be, but my wife loves it and that’s what matters.
Conclusion
Not a lot to be learned here but I hope you enjoyed seeing what I made. If nothing else this will serve as a good bookmark to reference later as I improve at woodworking and blacksmithing to see my earlier work.

That is some great some serious work. Nice to see you are using your new found free time well. 🙂
Thank you. Got a lot more to show too when I get around to writing up some articles.