My wife needed some standing container gardens and I was going to start building them from wood like most people do. I then stumbled upon someone selling 55 gallon drum barrels that were food grade and already cut in half; perfect to be used for a container garden. For the price, and the fact these things will never rot out, I knew it was the way to go.
The next step was building a standing frame for the barrels so they would be off the ground and at a good height to avoid constantly bending over.
Below you’ll find how I went about building the frames for these barrels to make quick and easy container gardens.
Building the Prototype
The barrels (cut in half) measure 34″ long x 22″ wide x 11″ tall and I had to figure out a way to do a stand to sit the top of the barrels at around 36″ tall. At that height there wouldn’t be a need to bend over.
I did some test fitting to see about using the X pattern you often see with barrels, but I realized to get the height I needed meant the wood would stick out quite a bit at the bottom and become a tripping hazard.
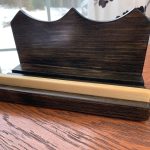
I wanted a stand that wouldn’t jut out from the barrels themselves and after some messing around I came up with an idea. I’ll just show you.
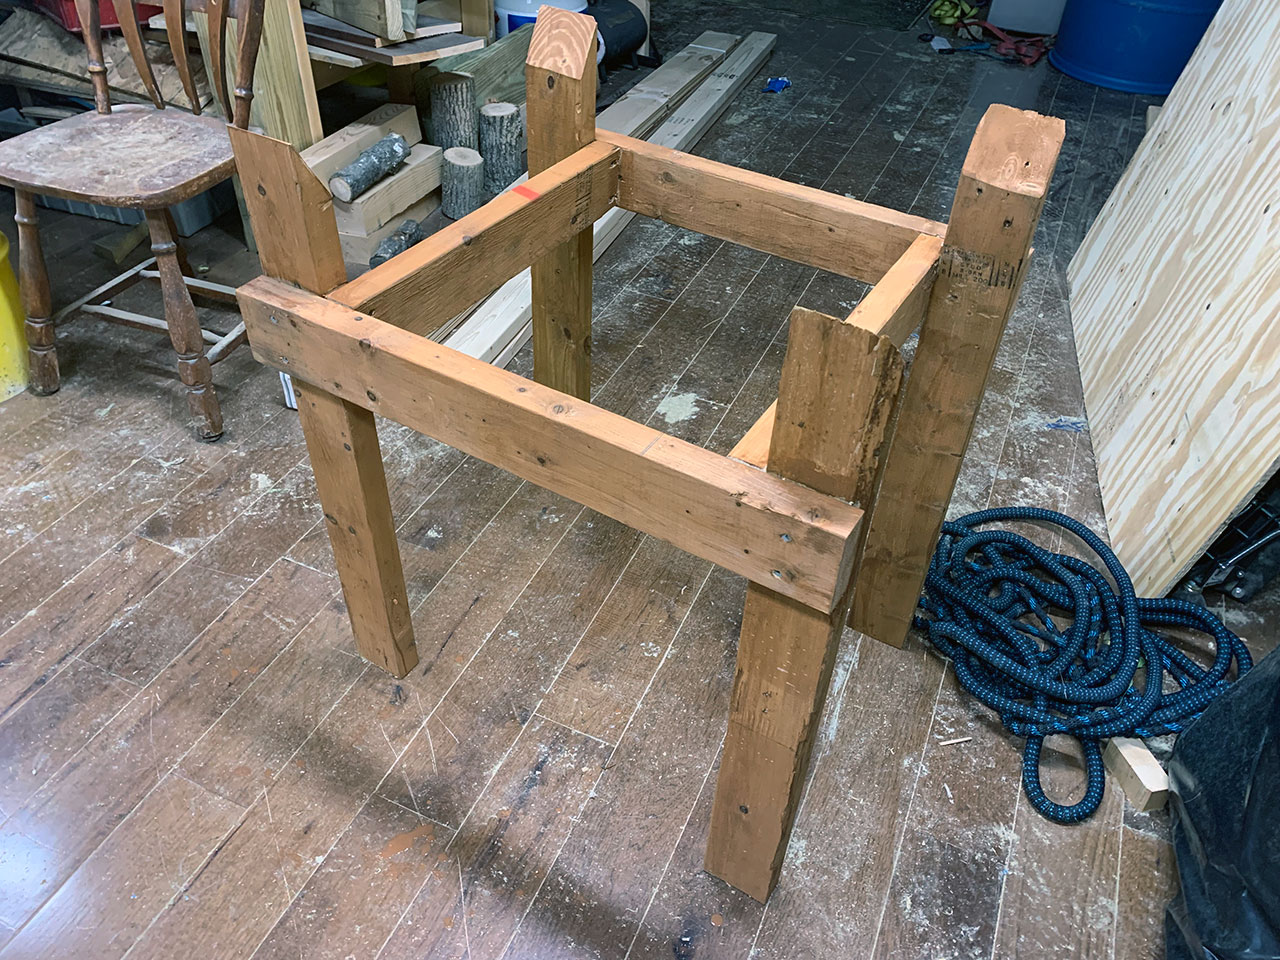
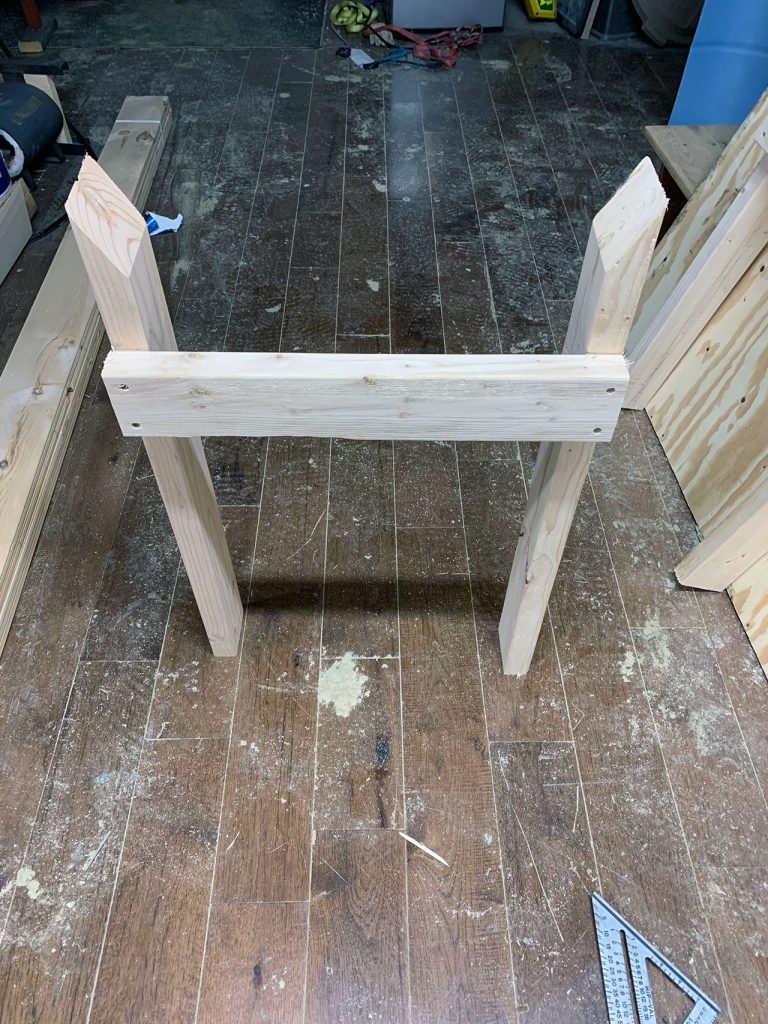
The barrel’s bottom rests on the cross supports on the sides. The corners come up to offer support to prevent the barrel from rolling over and I cut those ends at 60 degrees to contour with the barrel shape for better support.
I’m not going to pretend I approached this with a plan anything then what was mentioned above: getting the right height without sticking out too far.
I liked how everything looked so I set about cutting enough to do 7 more barrels (8 total).
Raised Garden Bed Barrel Support Part List
This is the plan I created for the barrels I have, which were 55 gallon barrels. You may need to adjust these for your own barrels but it should get you into the ballpark.
Here’s the list of what you’ll need:
- 2×4 x 31 3/8″ (4 legs)
- 2×4 x 26 3/4″ (2 leg supports)
- 2×4 x 20 3/16″ (2 leg supports)
- 2 1/2″ exterior screws to put it all together
You can get all 4 leg supports with one 8′ 2×4 and then you’ll need two more 8′ 2x4s for the legs. If you wanted to save some money you could do this with 2x3s as well. You could also replace the leg supports with 1″ material as well without really sacrificing structural strength.
Putting Together the Raised Bed Stand
I admit I didn’t get the best shots when putting this together; I kinda forgot. Still, it’s a pretty forward assembly once your parts are cut.
Everything is a square cut except the legs. Those measure 31 3/8″ in length with a 60 degree cut at the end to hug the barrel.
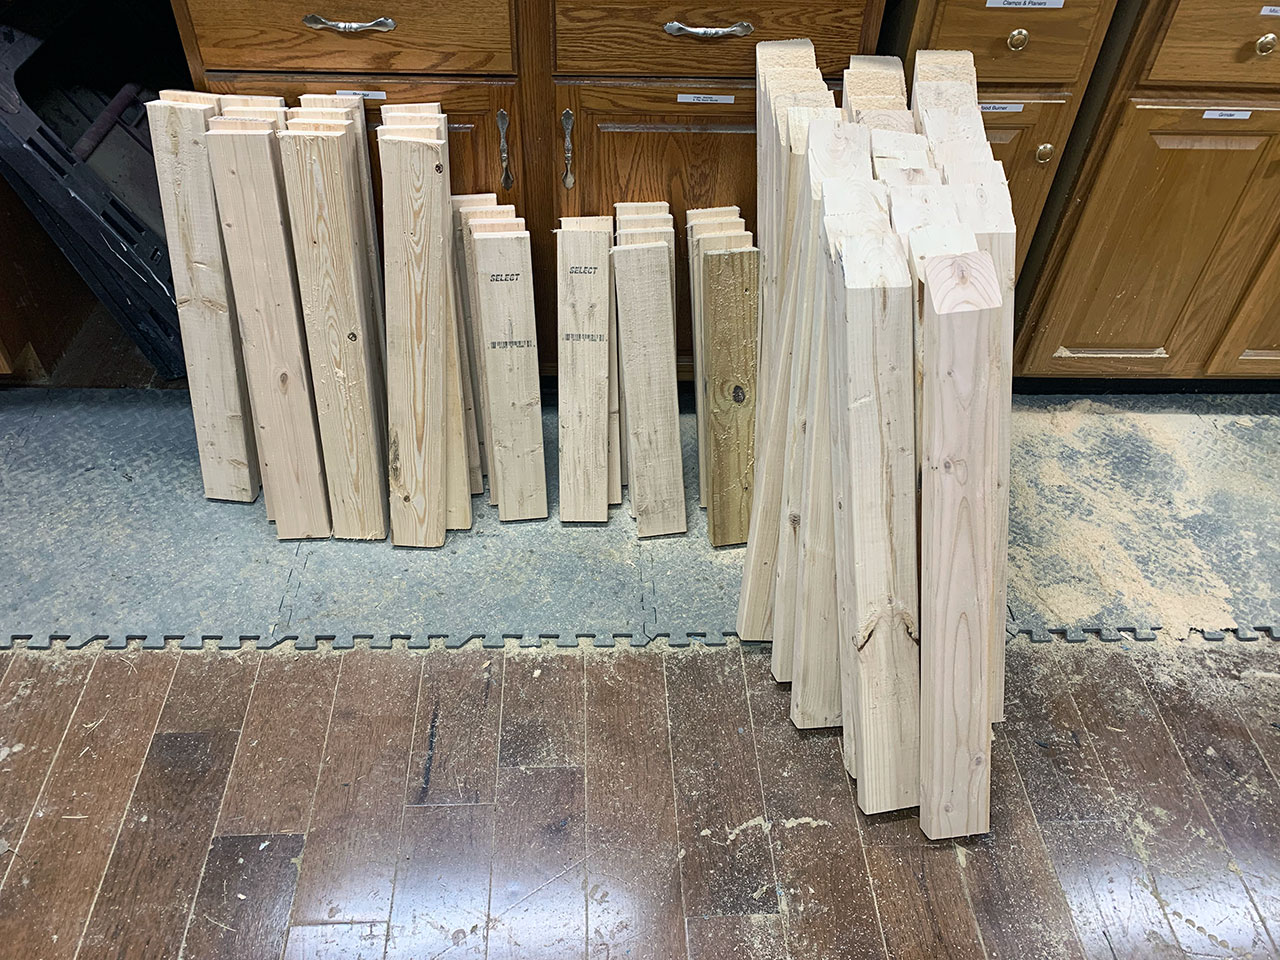
Here’s all my parts cut to length for the 7 frames I had to build.
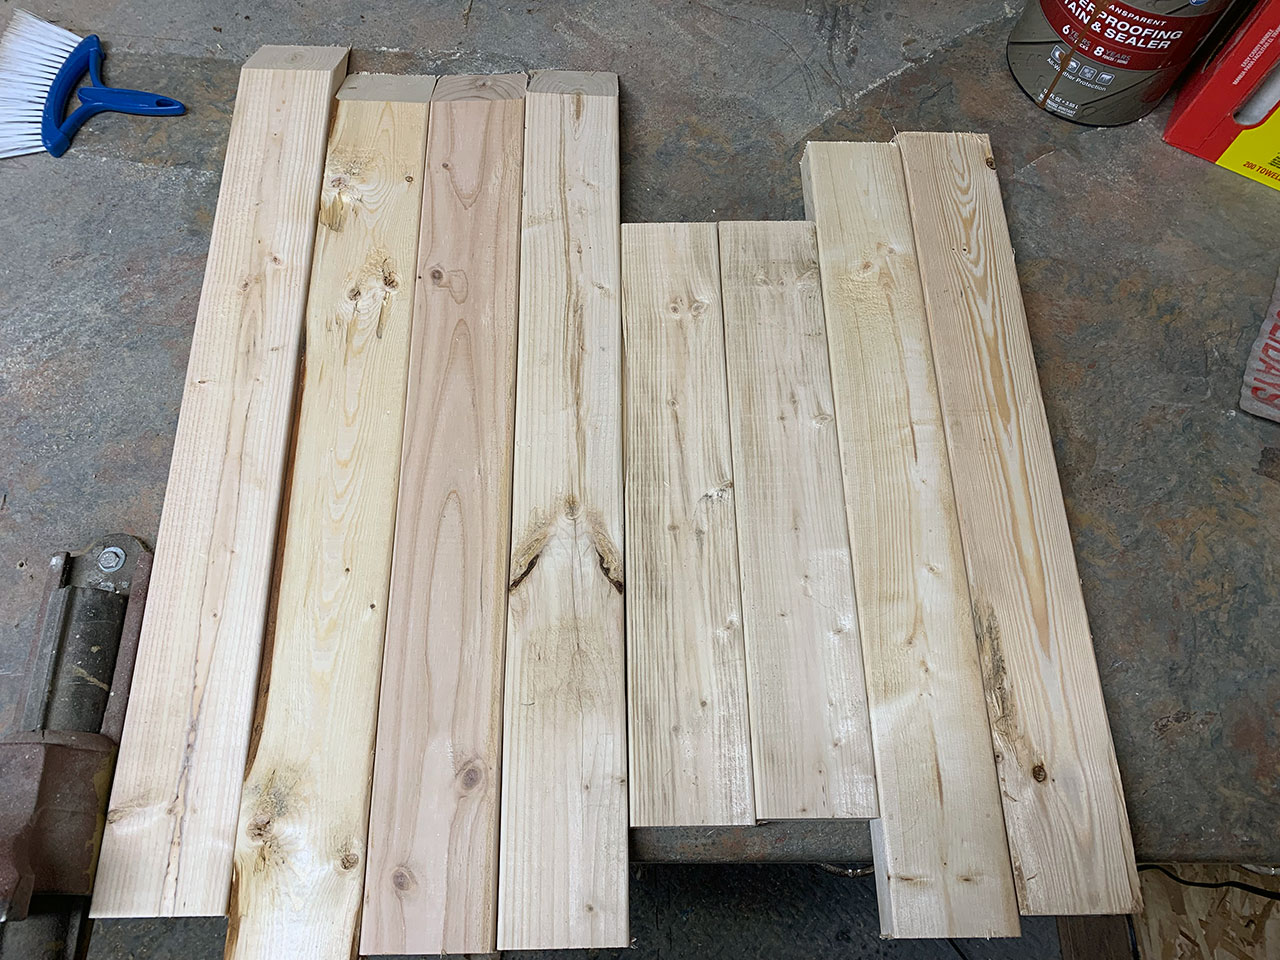
This is the parts for a single standing container garden frame.
I started with the legs and measured for the placement of the side supports. For this I measured up from the bottom (squared cut) 25 1/8″ and marked my lines. The top of the supports line up on those lines.
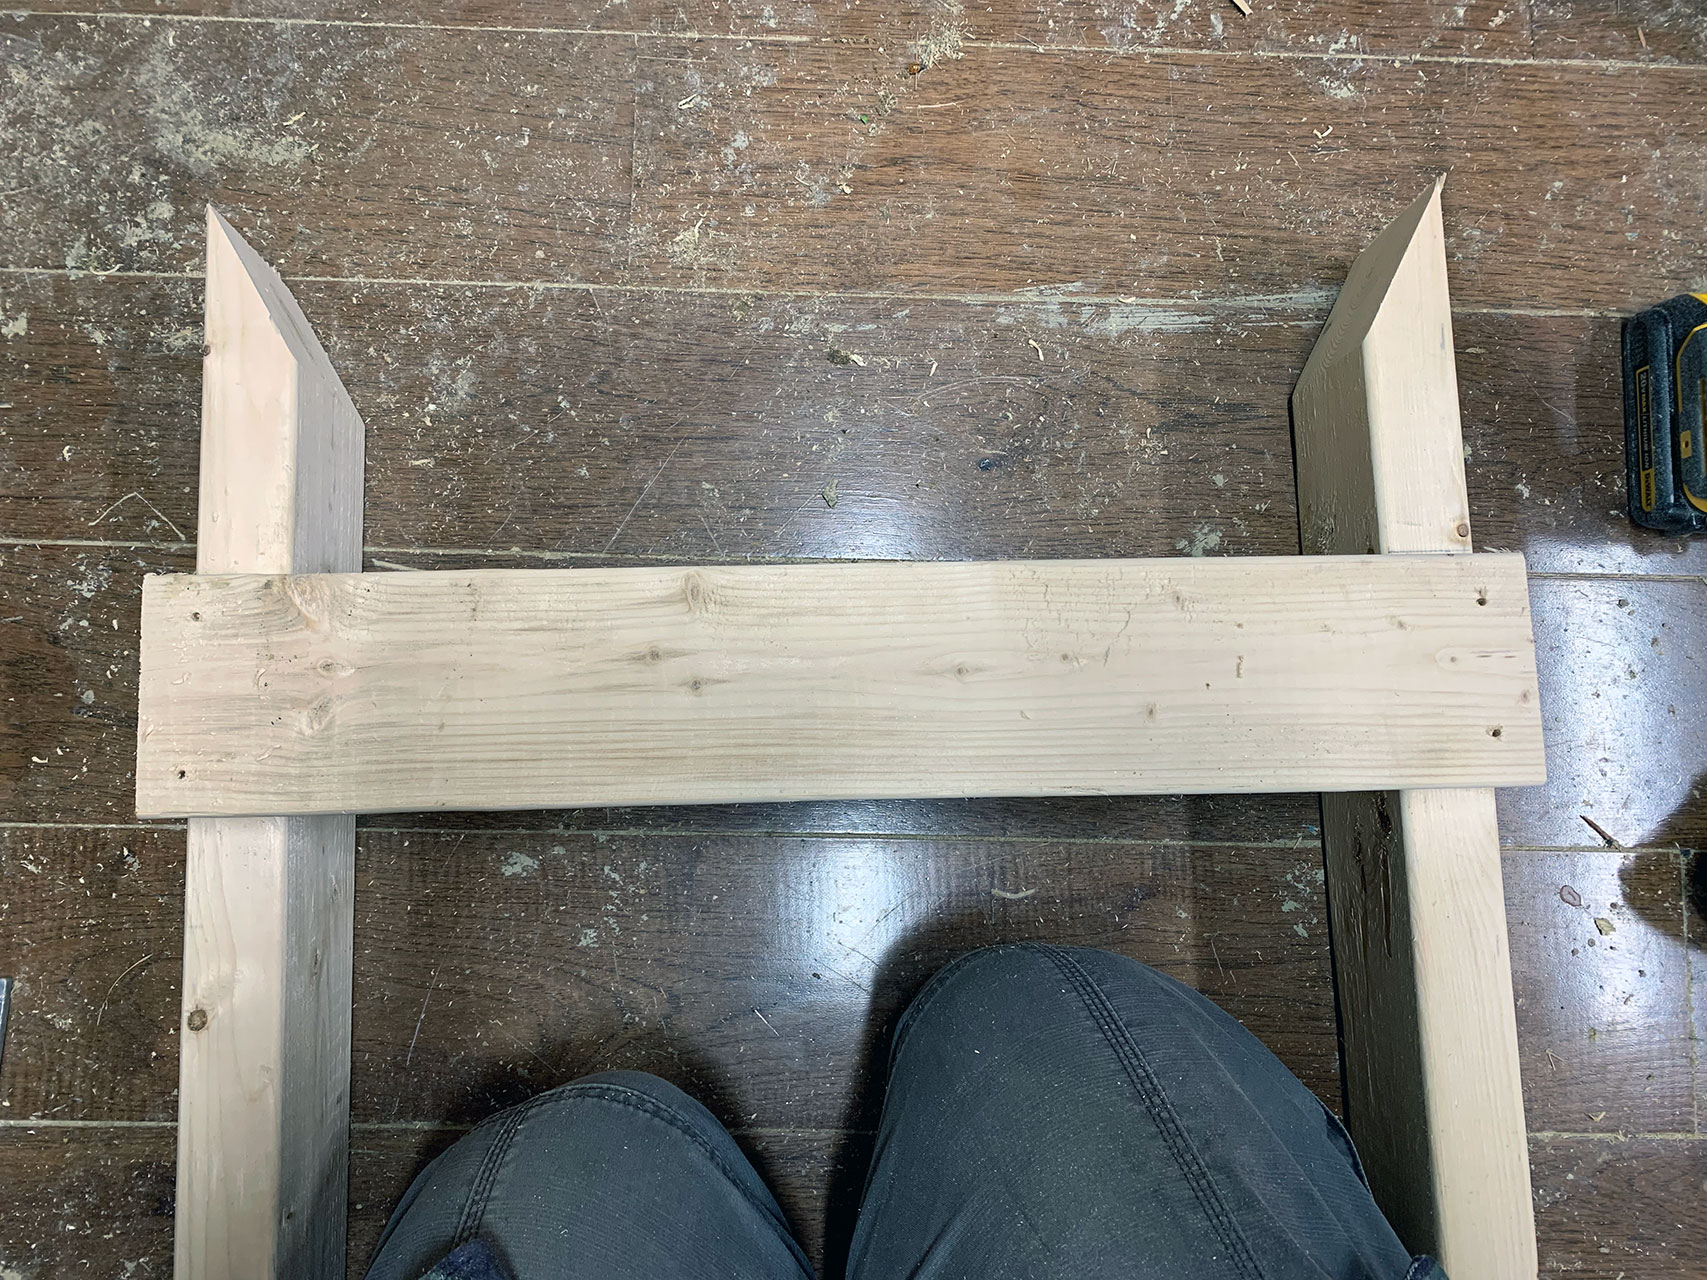
I placed down the support and predrilled the holes for the screws. You could use 3″ exterior screws for this since it’s going into the 2×4 on the side but I used 2 1/2″ exterior screws since that’s what I had and was using for other areas where 3″ would be too long.
With one set of legs done I did the same for the other set.
With both sets of legs done it was time to add the side supports to attach it all together. These supports line up with the front and back supports already attached. I did make sure that these side supports attached so the legs were square (90 degrees) so everything would stand straight.
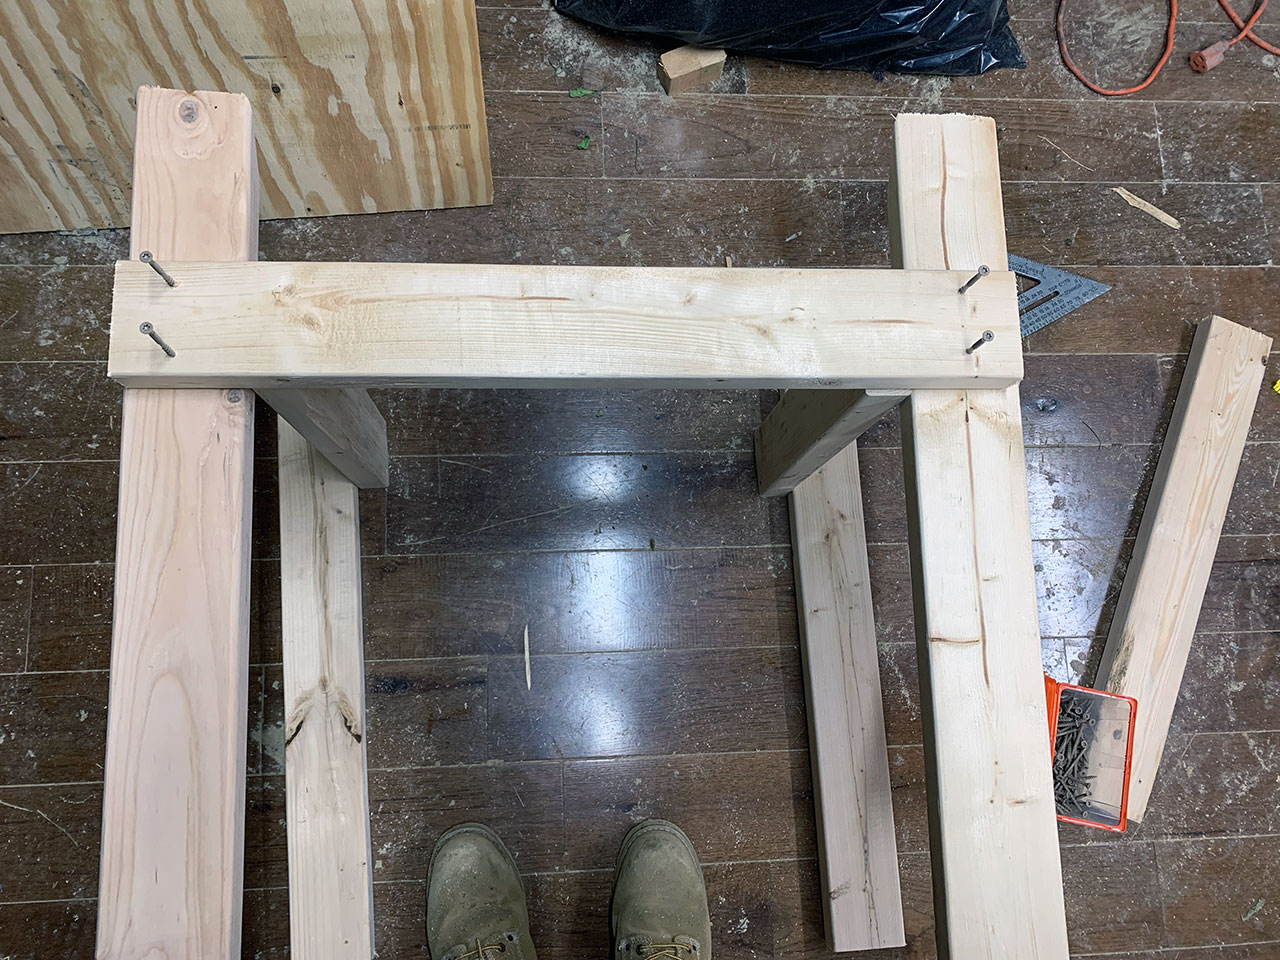
With both side supports attached it’s all done!

I then put the barrel on there to make sure everything looked good.
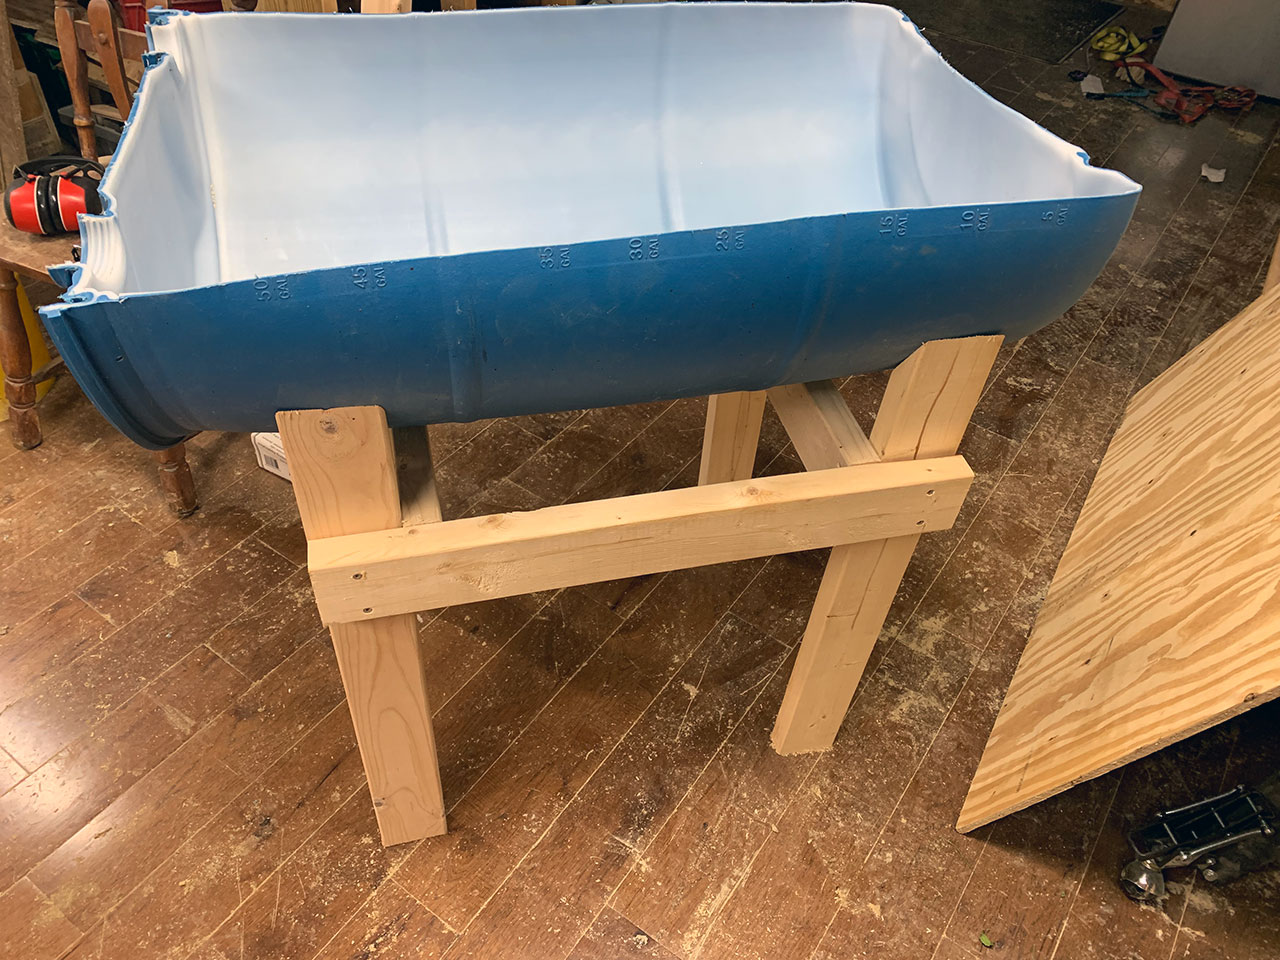
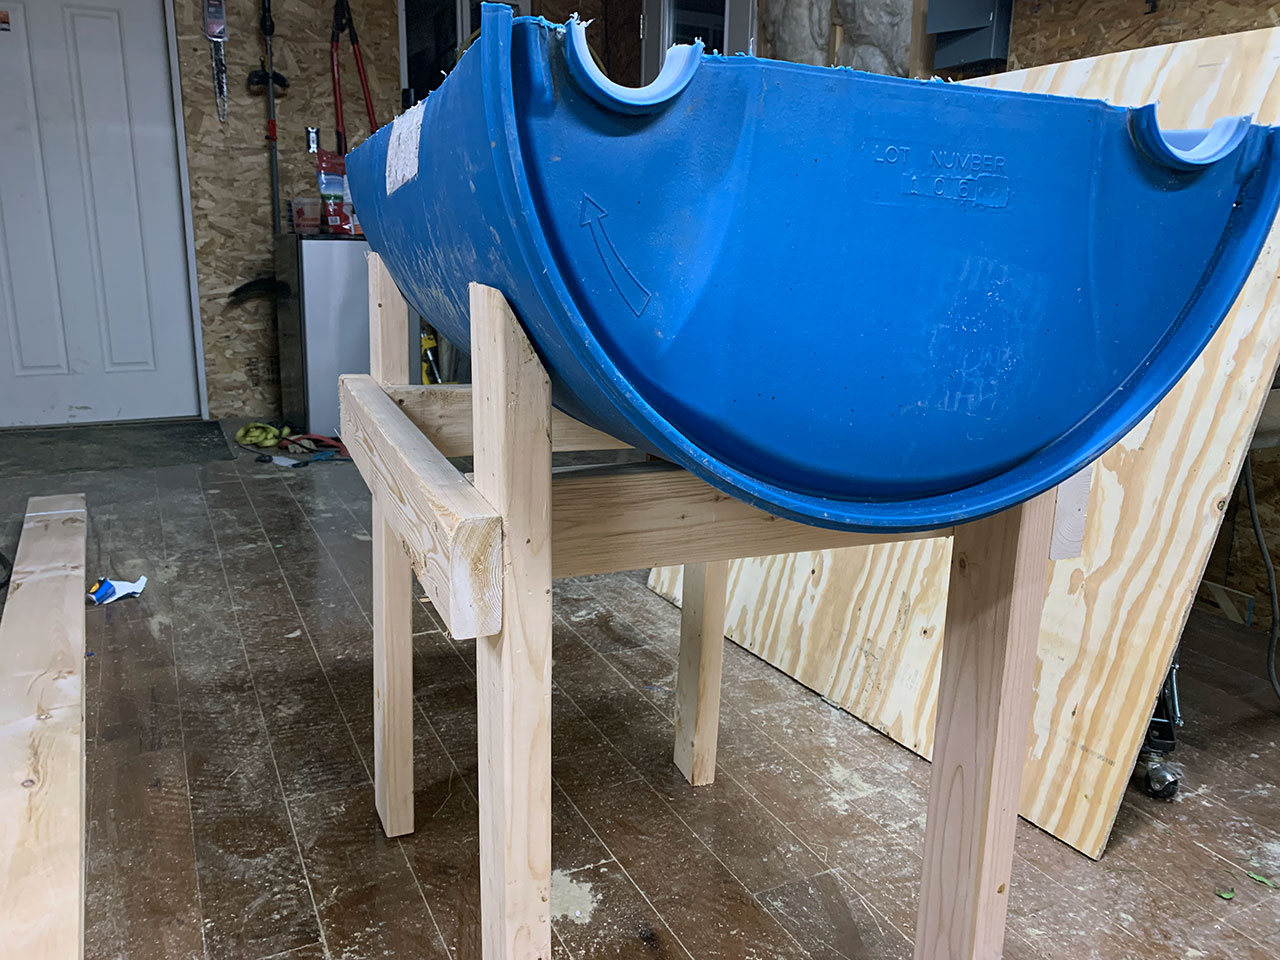
Note how the legs are back a bit from the front and back of the barrel. This is because the barrel is narrower at the top and bottom. The legs are back to where the barrel is the same width. This way I didn’t have to cut different sized legs based on the varying sizes at both ends of the barrel.
Finishing Off the Standing Container Garden Frames
I didn’t use pressure treated wood for these container frames. My wife wanted them stained and instead of waiting 30+ days to be able to stain the frames (pressure treated wood needs to dry and weather first) I used normal 2x4s. The stain with sealer built in will keep these in good shape.
Still, you could use pressure treated wood here and save yourself the staining or painting if you wanted.
For this task of staining 8 standing container garden frames I used my Wagner sprayer.
I got this 10+ years ago as a Christmas present and it’s been a godsend. The Wagner easily cuts my paint time down by 75%. I’ve got a tutorial on using a Wagner paint sprayer as well if you’re curious about getting one yourself.


With the sprayer I spent about 30 minutes staining all 8 of those frames.
I should note that I did drill 1/2″ holes in the bottom of the barrels for drainage before I set them up for planting. I drilled probably 12 holes in total.
Complete!
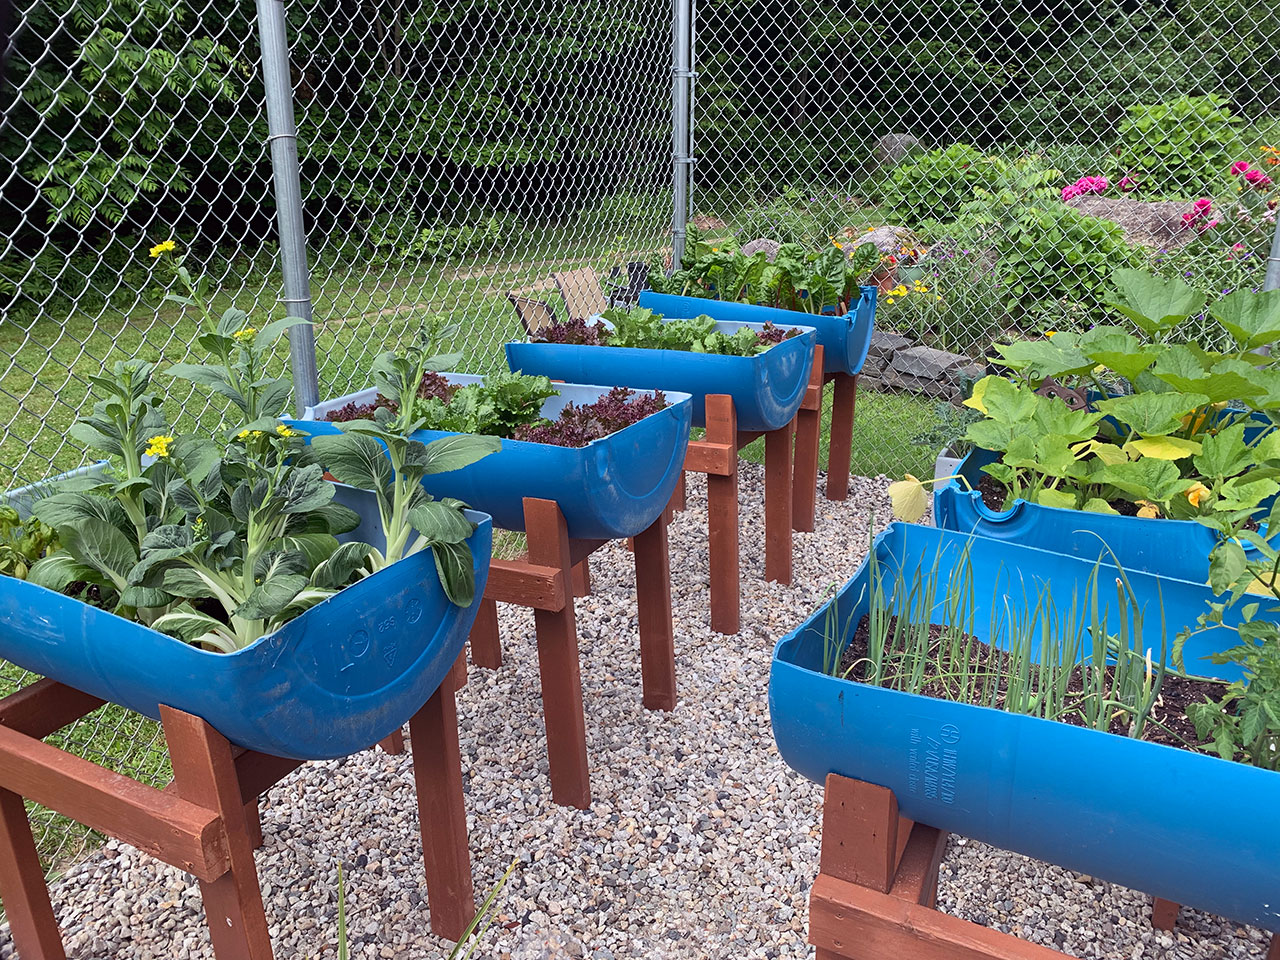
With everything stained it was time to put together the garden area. Here’s a shot of the standing container garden frames in use a few months later with some growing veggies.
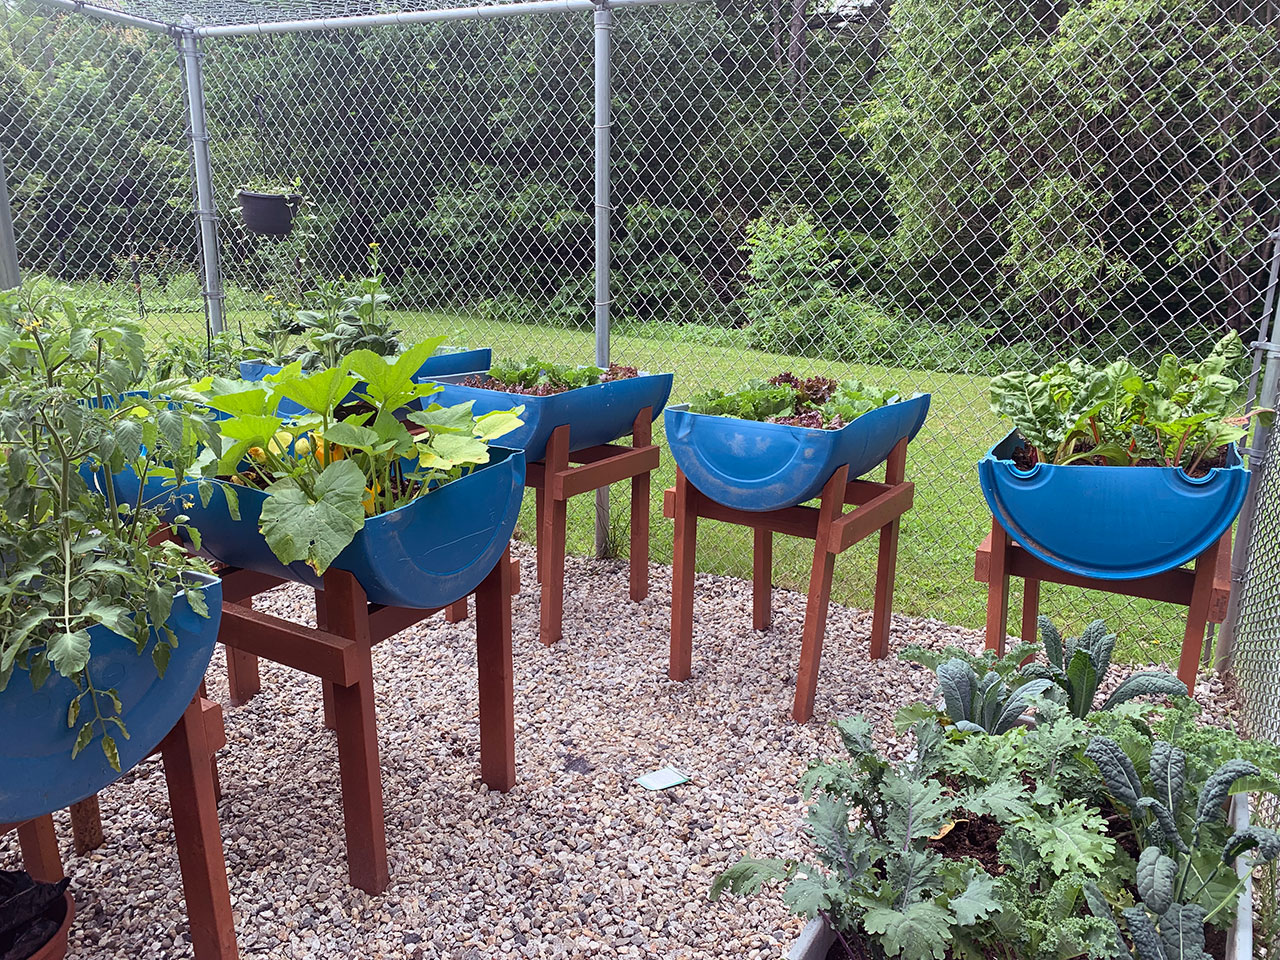
Conclusion
There you have it! These standing container garden frames for the barrels were super easy to make and not too expensive (though lumber prices are still rather insane). As I said above, you could save some money by going with 2x3s for the legs and 1″ lumber for the supports and it should hold up just fine.
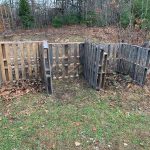
If you enjoy gardening and are looking for a way to setup a cheap compost bin system, then check out my article on building pallet compost bins.
Thoughts, suggestions, or ideas? Share them with me below!


It would be great if you would update the materials list to reflect 4x4s vs current leg description of 2x4s.
The pics do not reflect the narrative.
I figured it out.
I will recreate your build.
Thank you for sharing!
It may be the angle of some of the shots that gives a different impression but they are definitely 2x4s. You could go 4x4s but it’s a bit overkill on containers this size.
Thanks for taking the time to comment and best of luck on making yours!
So sorry, I responded when I had a bad day. Thank you for sharing this. It’s the easiest way I’ve seen to raise half barrel beds.
Ron
No worries.
Hello, I have a couple questions if you dont mind. How do you feel the barrels have worked? Do the roots have enough room for mature growth? Have you done any earthbox style with self watering systems in the barrels? Doing some research for my next gardening system. Thanks.
Anthony
They’ve worked very well. I’m not the gardener, my wife is, so best I can do is tell you our experience and maybe it will answer your question.
We’ve planted cherry tomatoes, lettuce, herbs, Swiss chard, summer squash, pickling cucumbers, chives, and more things I’m forgetting in those containers and it’s worked out very well for us. We haven’t run into any rooting issues. You get a good 12″ of soil you can put down so a fair bit of room for roots.
I’m not familiar with what an earthbox style is. If it’s when you build a raised bed on the ground though, then we have a few of those too. In those was where we put full size tomato plants and cucumbers. Those worked out well also.
I have wanted to do a water system for it but haven’t got around to it yet.
I would be interested in knowing what degree was your angle cut for the top of the barrrel support legs?
From memory it was around 66-68 degrees.
It looks great… and just where I’m at in relation to raised beds., and growing stuff. One of my wood ones with a wood base has just collapsed. and it was only 3 years old. Thank you. I’ve seen other options, while trying to figure out best option. So far this is the best I’ve seen
Glad to be of some help!
Thanks for sharing. This looks to be the most basic simple one I’ve seen and will be perfect for my application.
Glad you found it useful and good luck!
Am ready to give this a try. Just a question, how did you attach the lids after cutting them. Thanks
They aren’t attached at all. The weight of the soil keeps things where they need to be. I’d wager they weigh a good 30-40lbs once full. You could put a screw through the barrel into the legs that it rests on though if you wanted. Just be sure to angle it down to avoid going through the 2×4.
Hi did u make drain holes in garden barrels
Yes. I did, I drilled a bunch of jokes in the bottom of the barrels. The measurements were perfect. Everything worked like described. Very happy
Wonderful to hear.
Now that you’ve had the system a couple of years, I’m curious; how has it weathered and held up? Have you had to do any maintenance?
Many Thanks
They’ve held up really well. This is the third season with them and I have not had to repair anything or even restain them.
How much weight can these hold? I’m trying to build something like this to hold full barrels of water that are this same size, do you think it could hold that?
For full sized barrels of water I would add a 2×4 on each end on the outside. So if you look at my pictures you see the ends of the barrels and there’s 2×4’s it sits on in on the inside, add one on each end on that outside. The barrels won’t sit on them but they’ll give you some added strength to the frame.